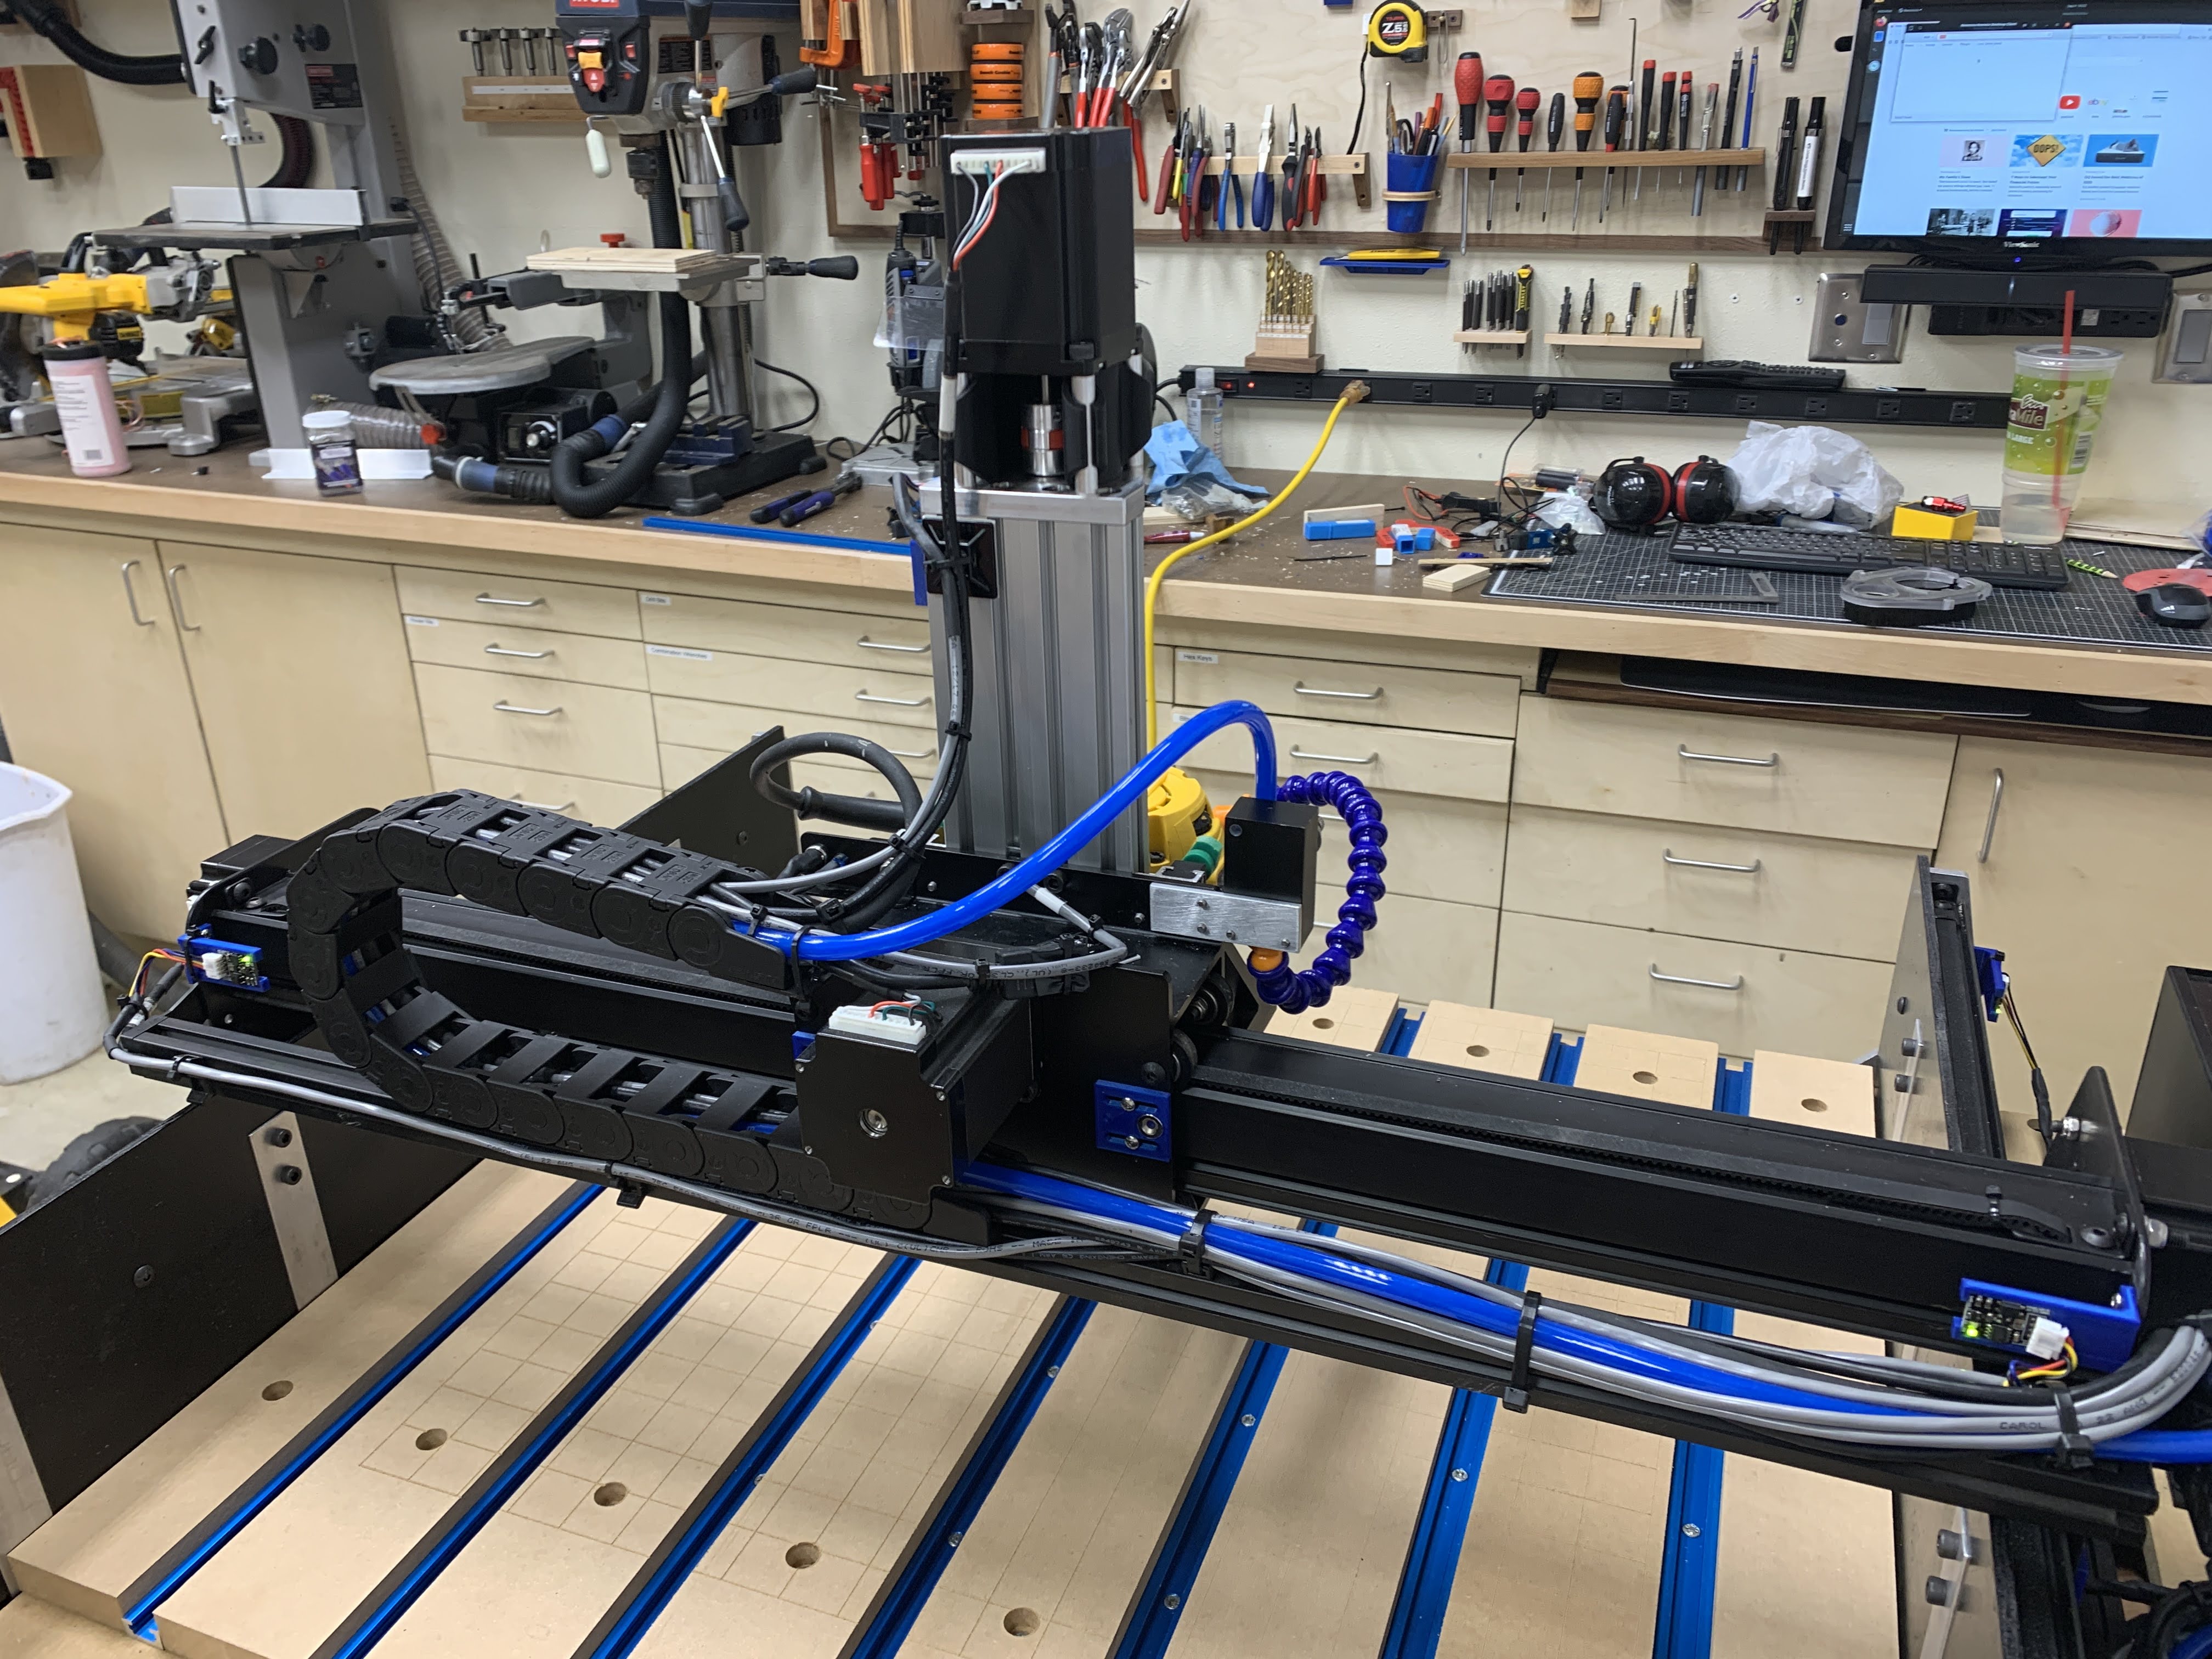
My X-Carve Build
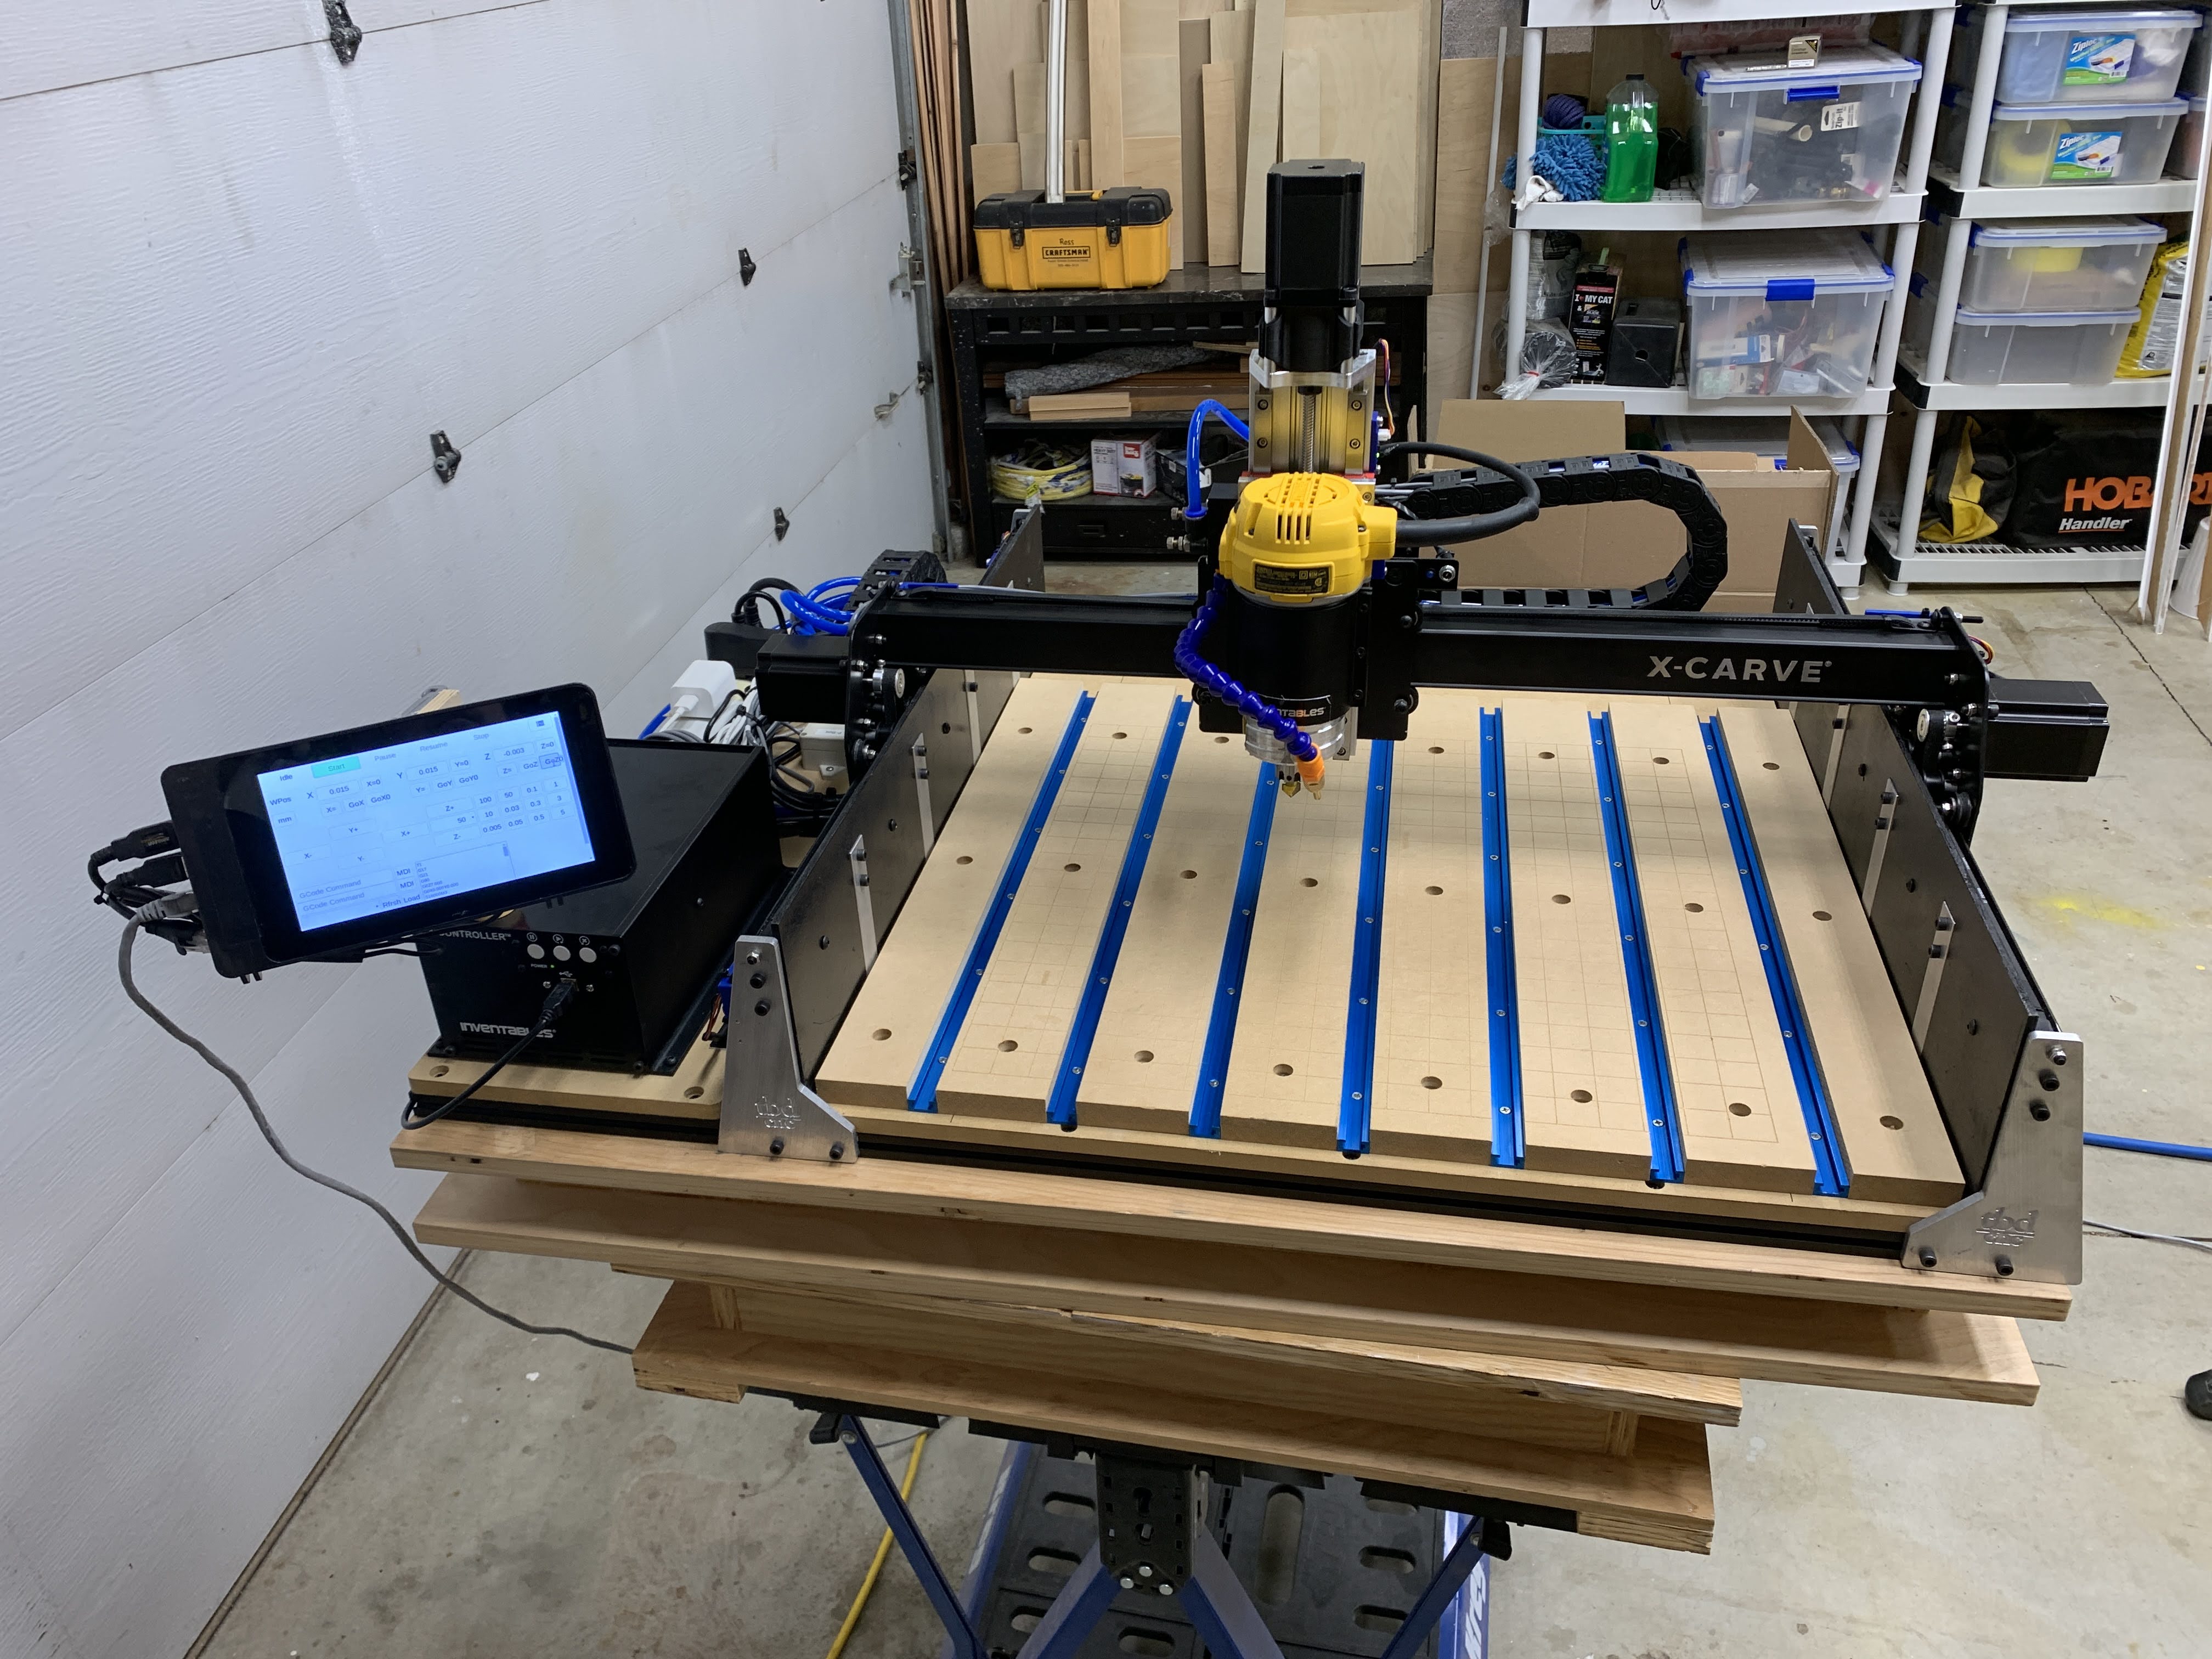
In 2017, I dove into the world of CNC machining with a purchase of the inventibles x-carve gen two 500mm x 500mm CNC router with x-controller kit. I built this machine and started to learn about the workflow of using a CNC router. I already had some familiarity with computer design but had never worked on developing tool paths and machine operations. It didn't take long for me to be hooked and looking to tweak my machine's performance. Over the years, I have done several things to it, but recently in the summer of 2020, I rebuilt the machine with some upgrades and re-wiring. I will outline some of the upgrades to the machine below.
Limit Sensors
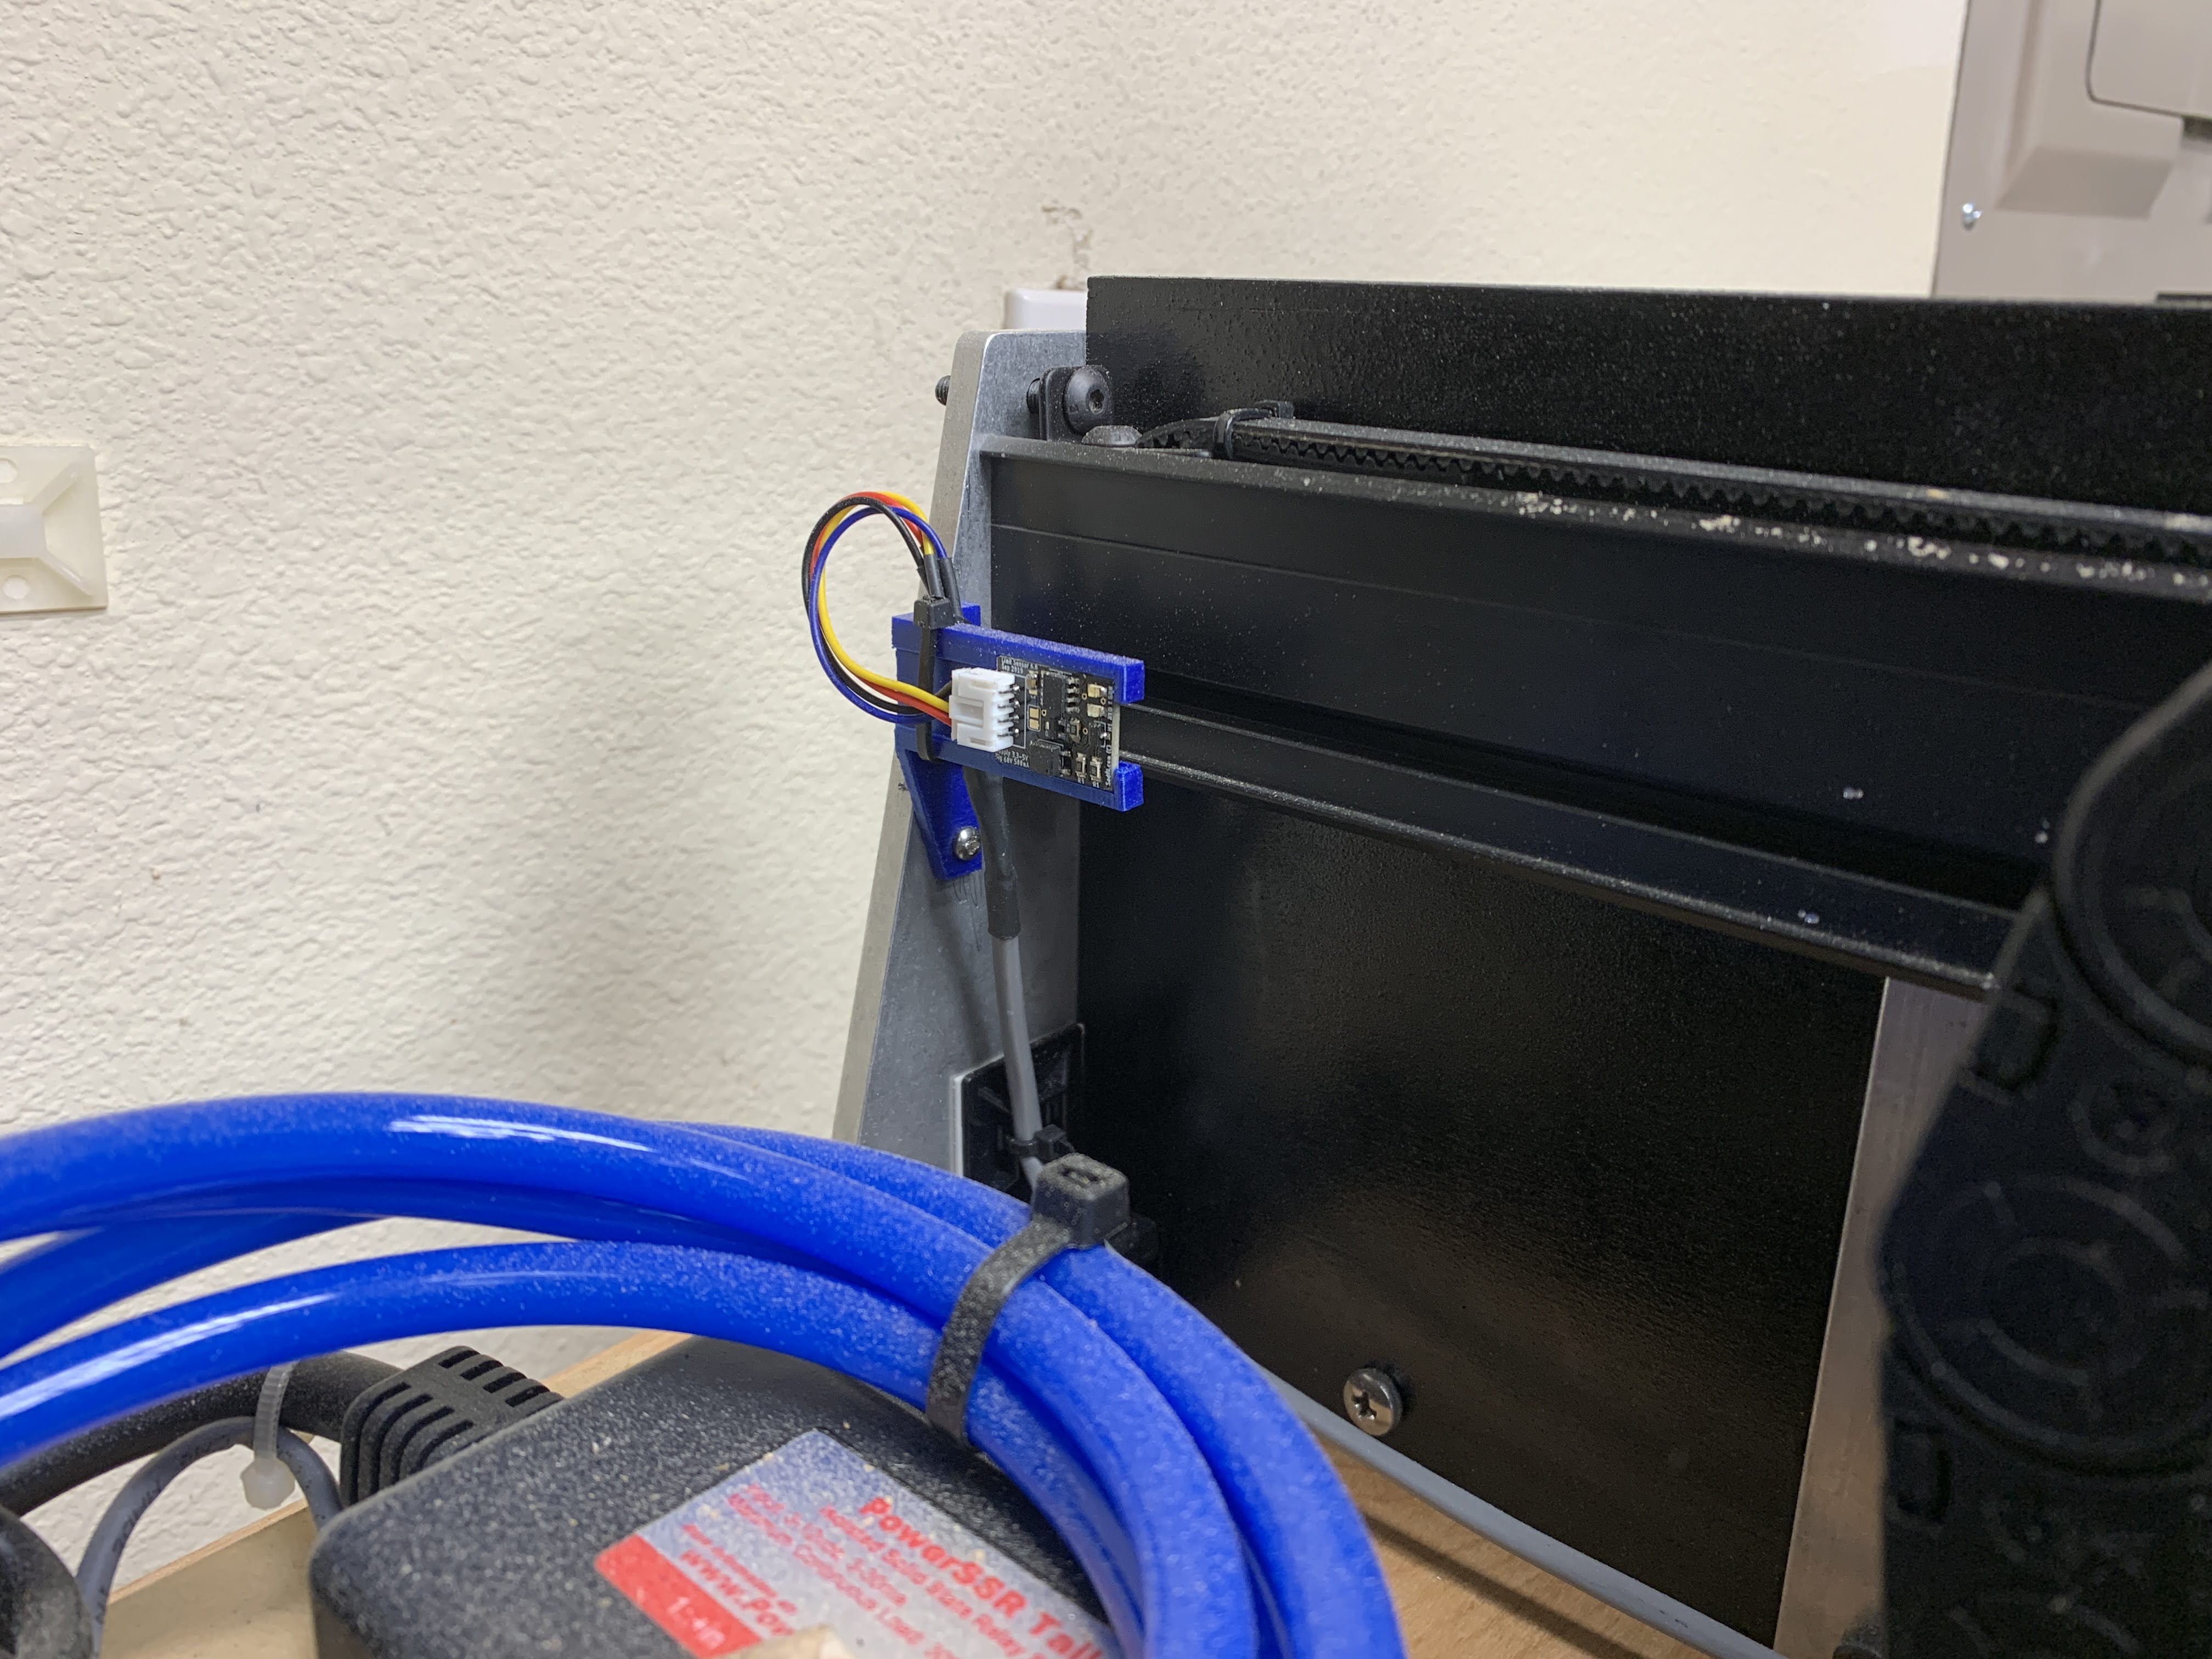
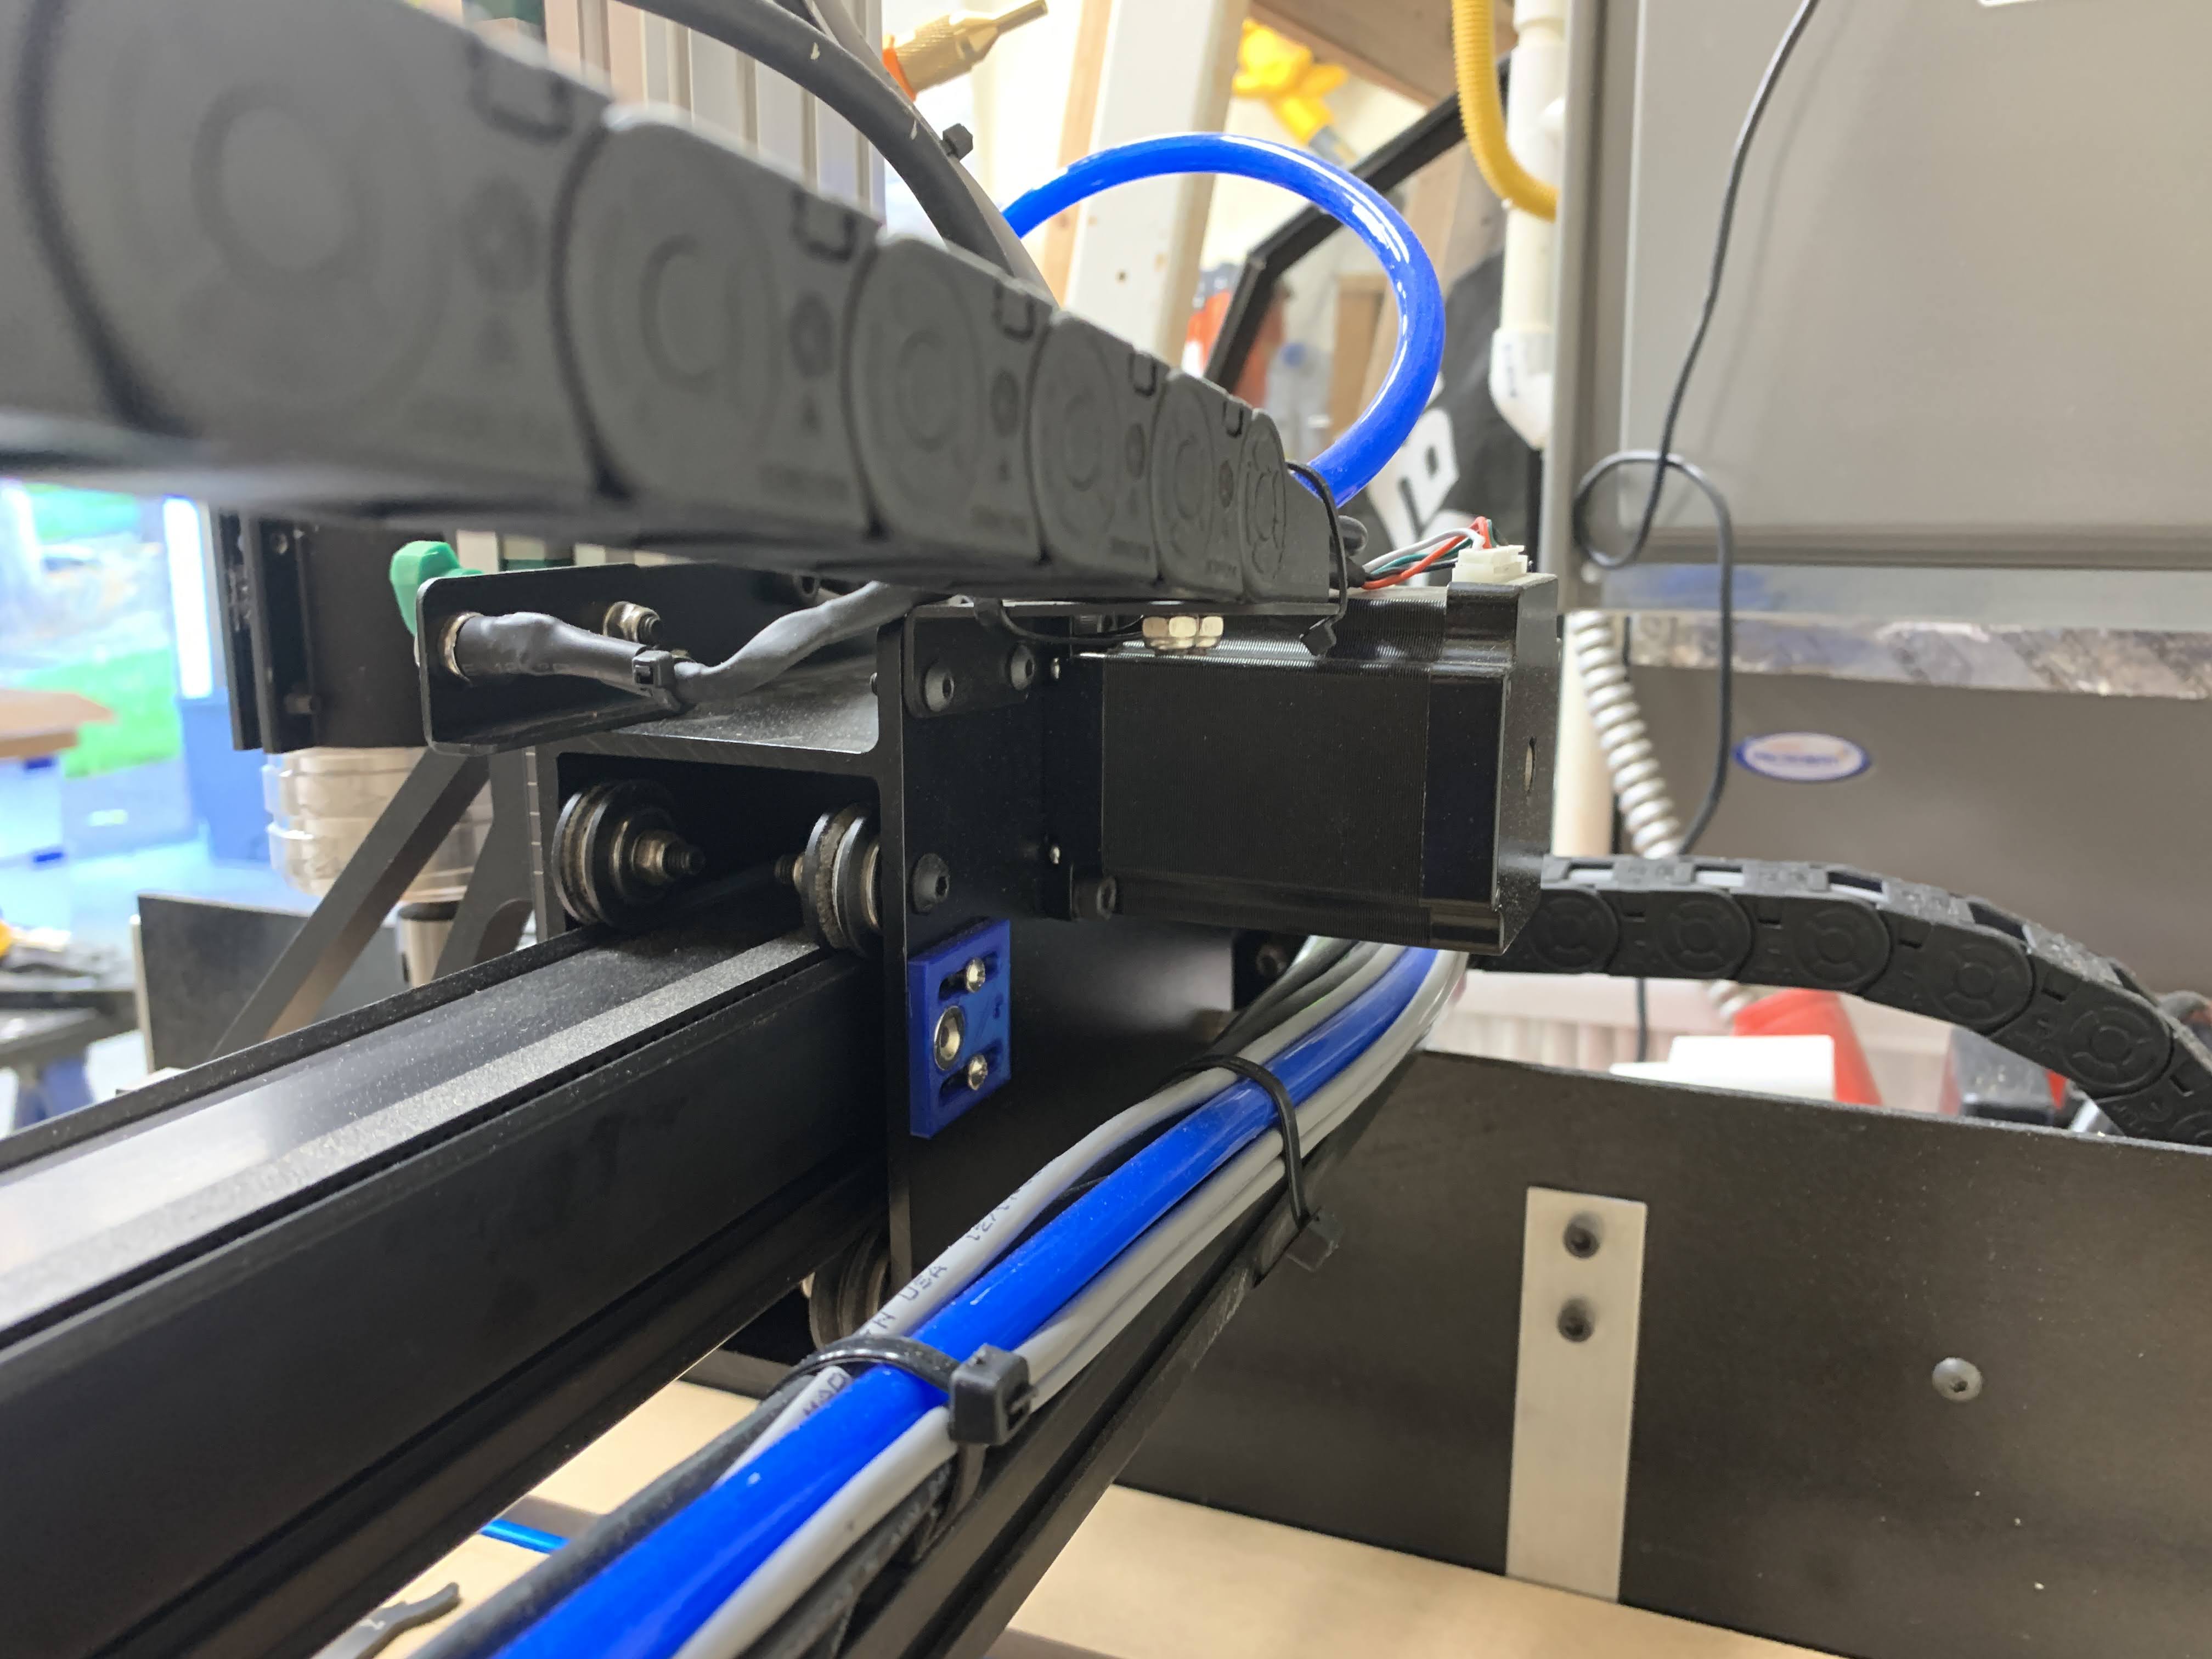
I replaced the standard x, y, and z-axis mechanical limit switches with Magnetic HAL effect sensors. These sensors are non-contact, and I highly recommend them. I purchased the newest revision 6 version through tindie from Solder / Filament Solutions. I have added five total sensors, both extremes on the x-axis and y-axis, and just upper on the z-axis. For mounting, I drilled and tapped #4-40 screws for custom 3d printed mounts. The limit switches are fixed, and the magnets travel. I did end up with five magnets, one for each sensor. The extra limit switches allowed me to enable limit switches in the firmware and prevent me from crashing the x-axis and y-axis into the ends, which I would frequently do when jogging or having my offsets wrong.
The sensors have four wires, +5VDC, Ground, and then a pair of contacts configured for normally open or normally closed. The 2nd limit sensors for the x-axis and y-axis are wired in series for the dry contacts. I powered the sensors off of a USB 5VDC 1AMP wall charger.


Probe
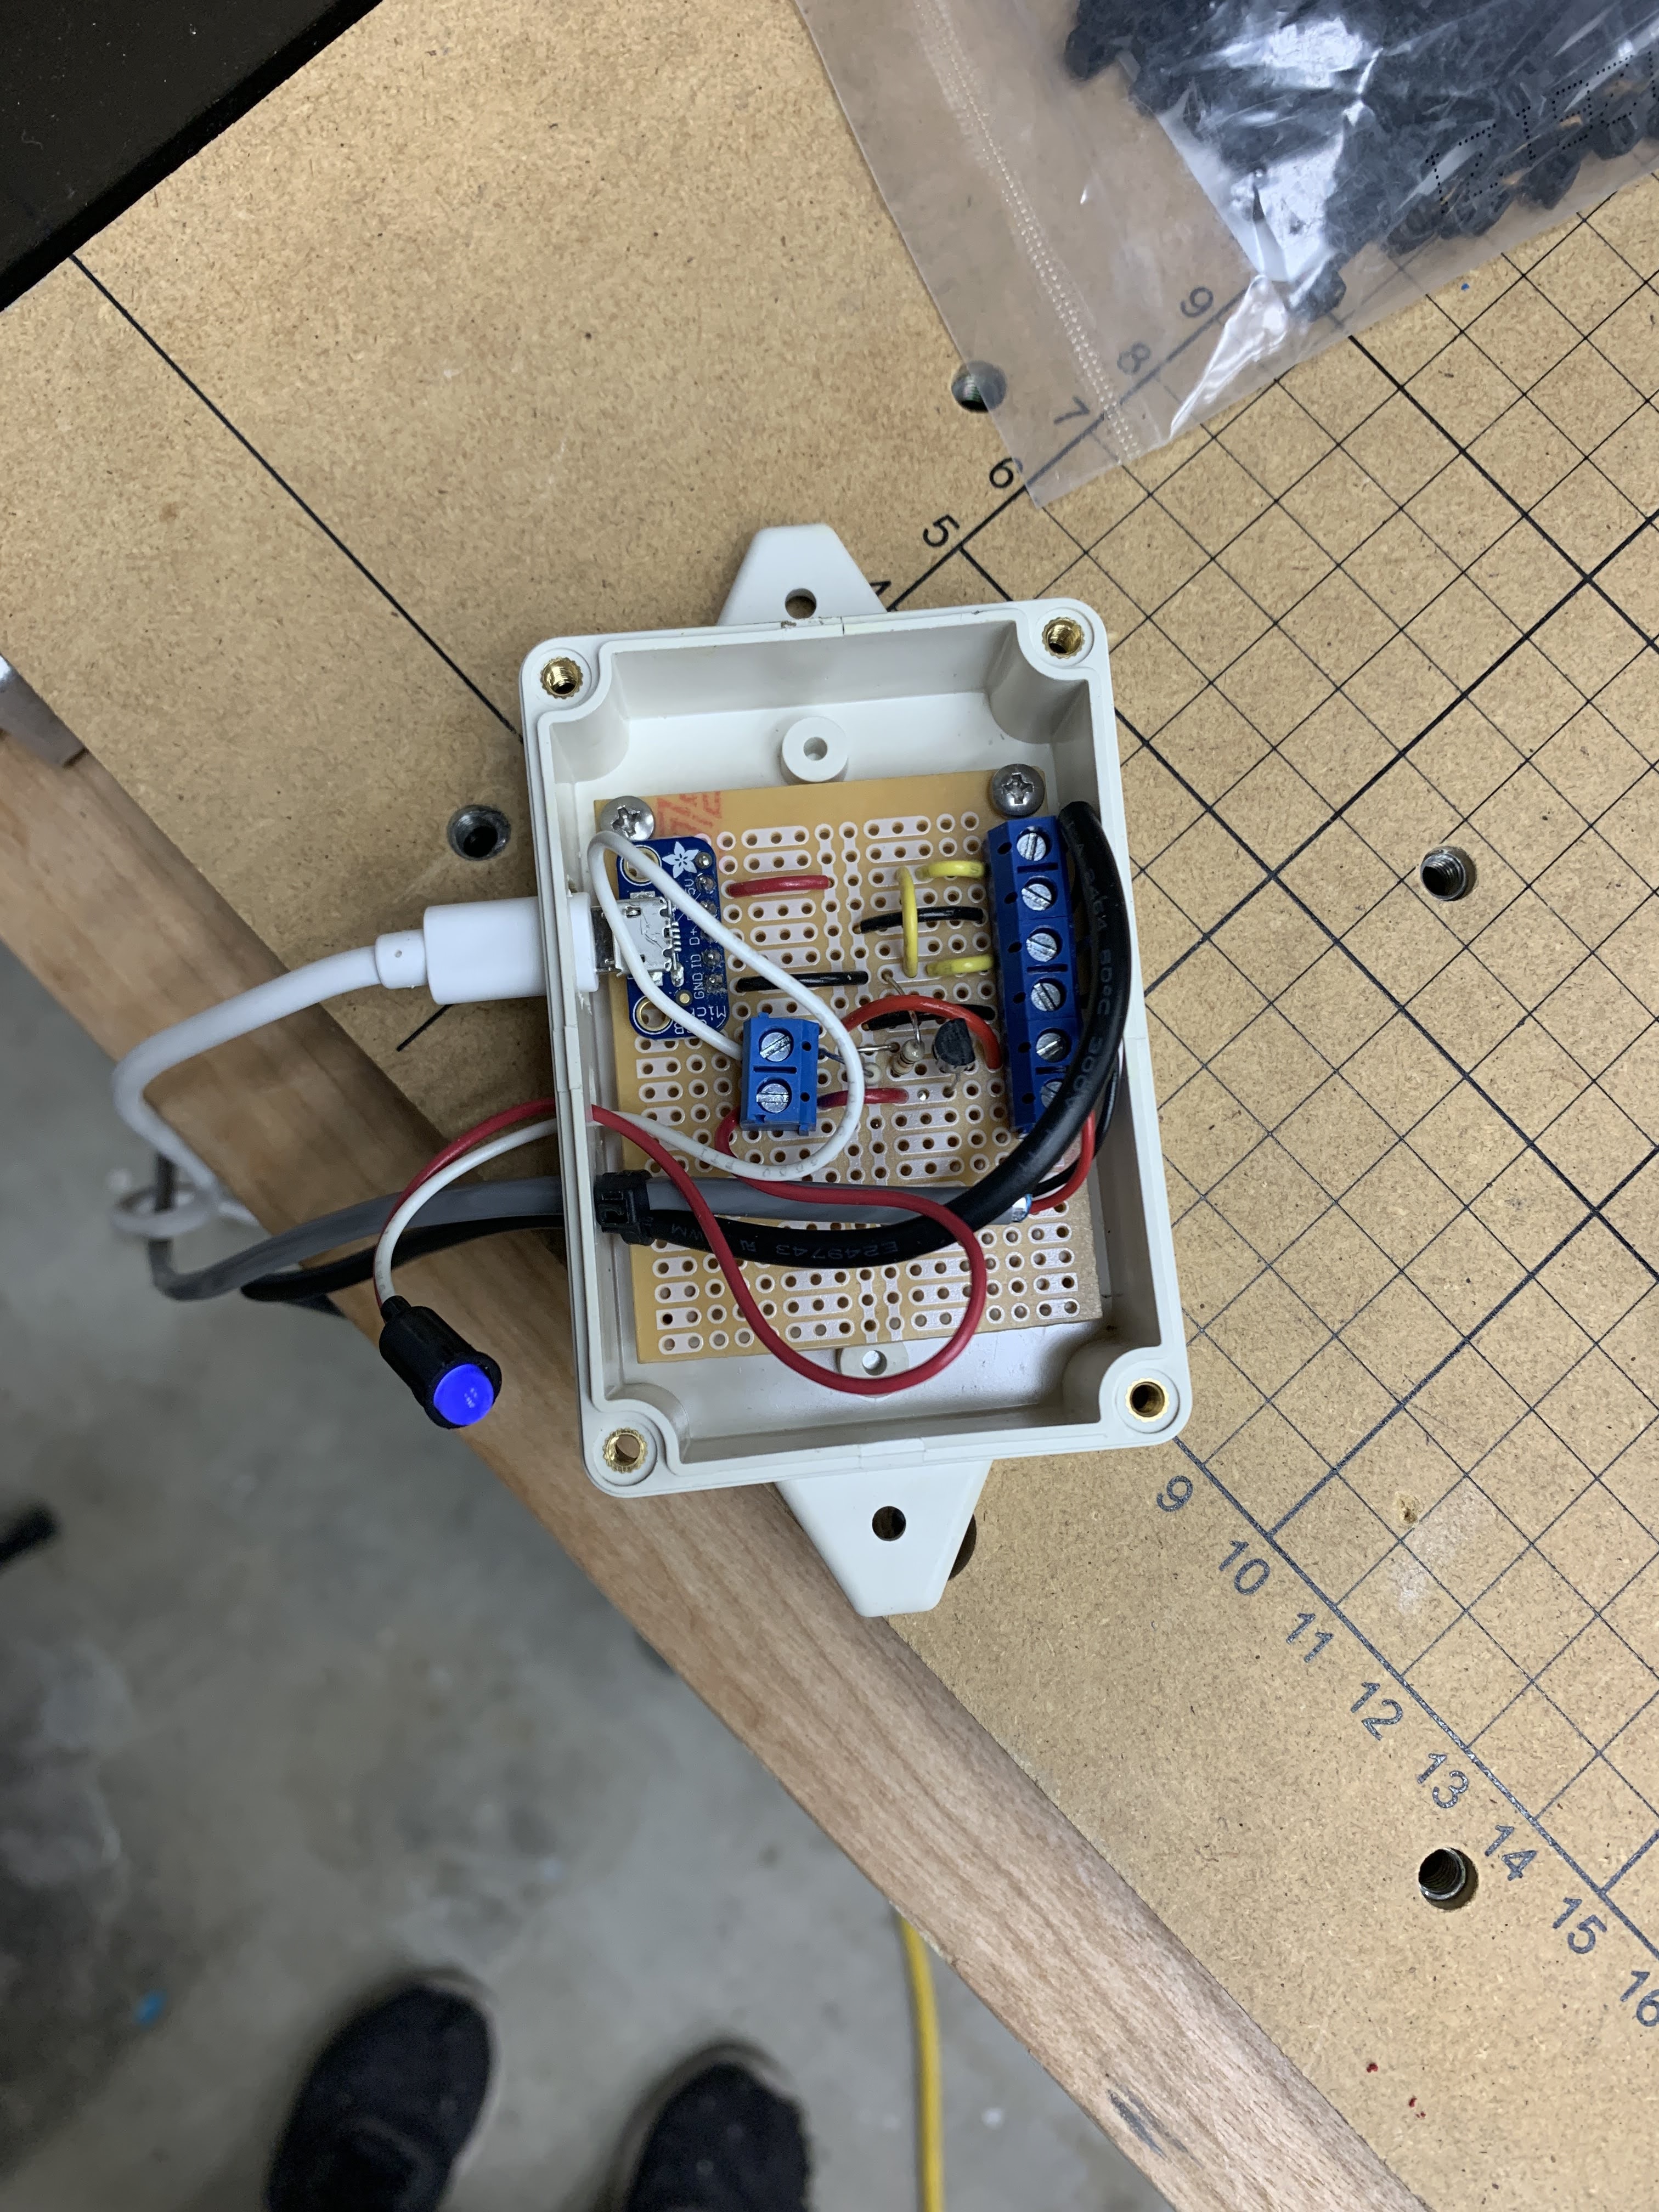
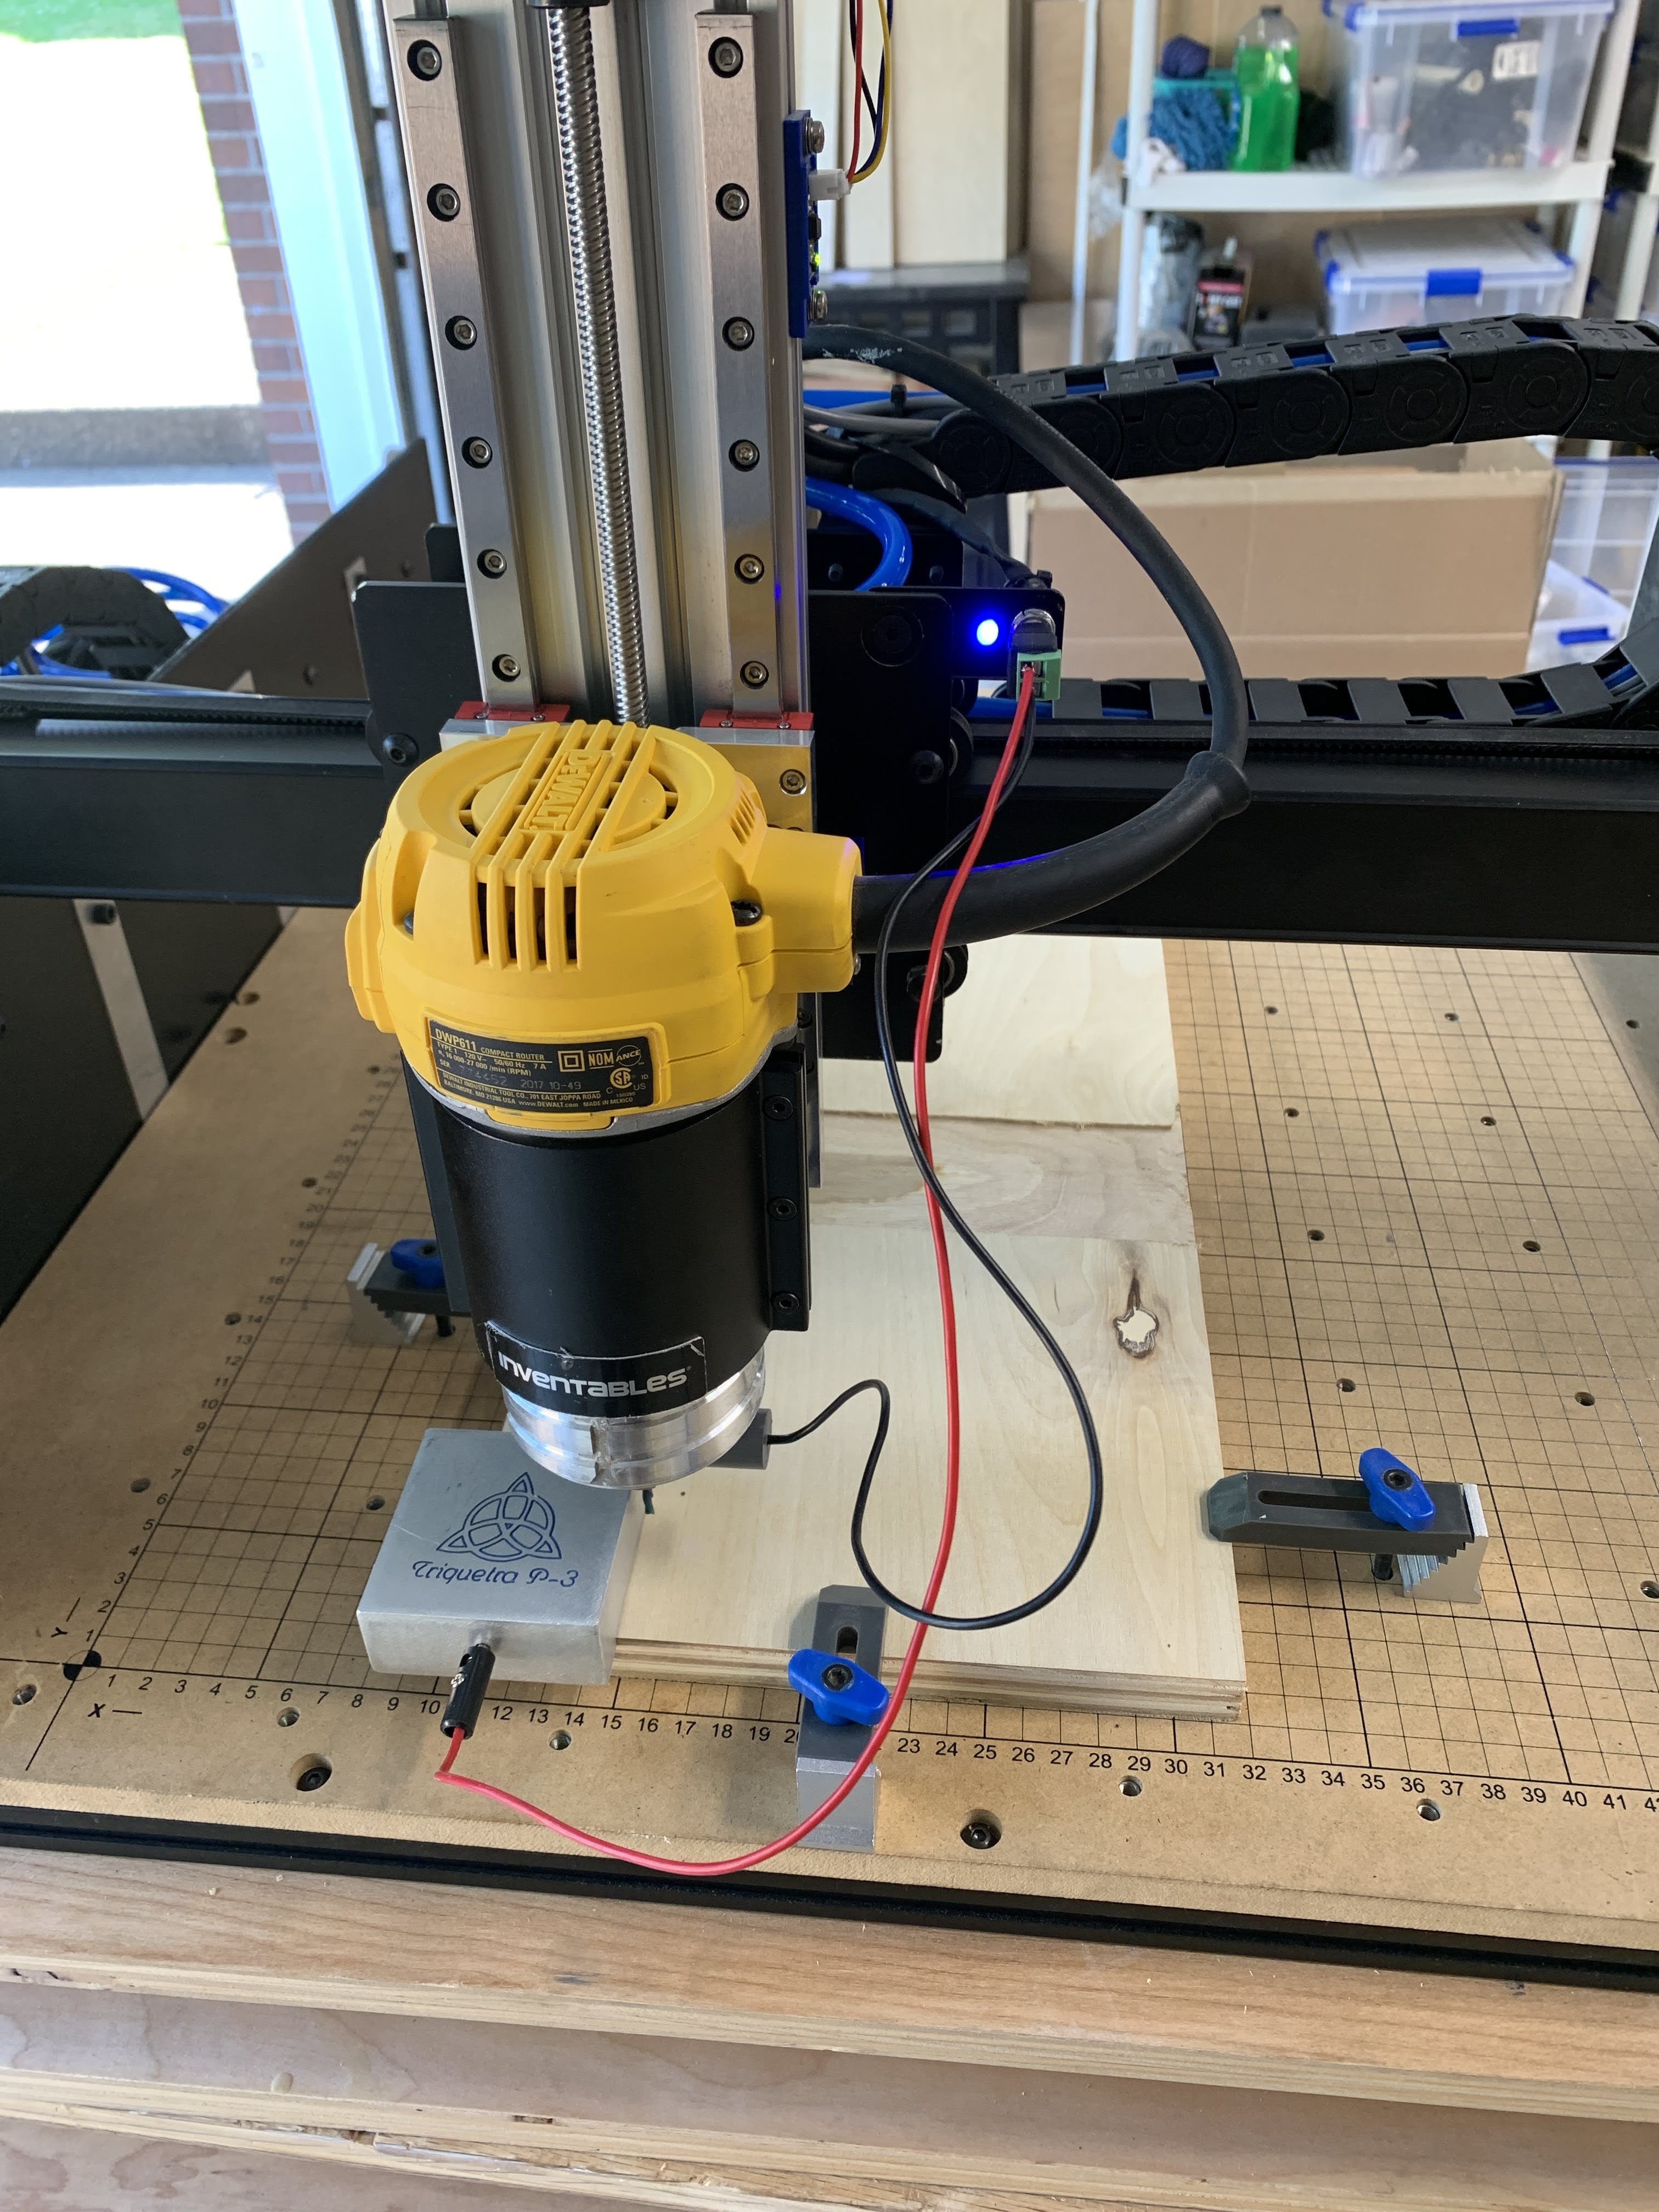
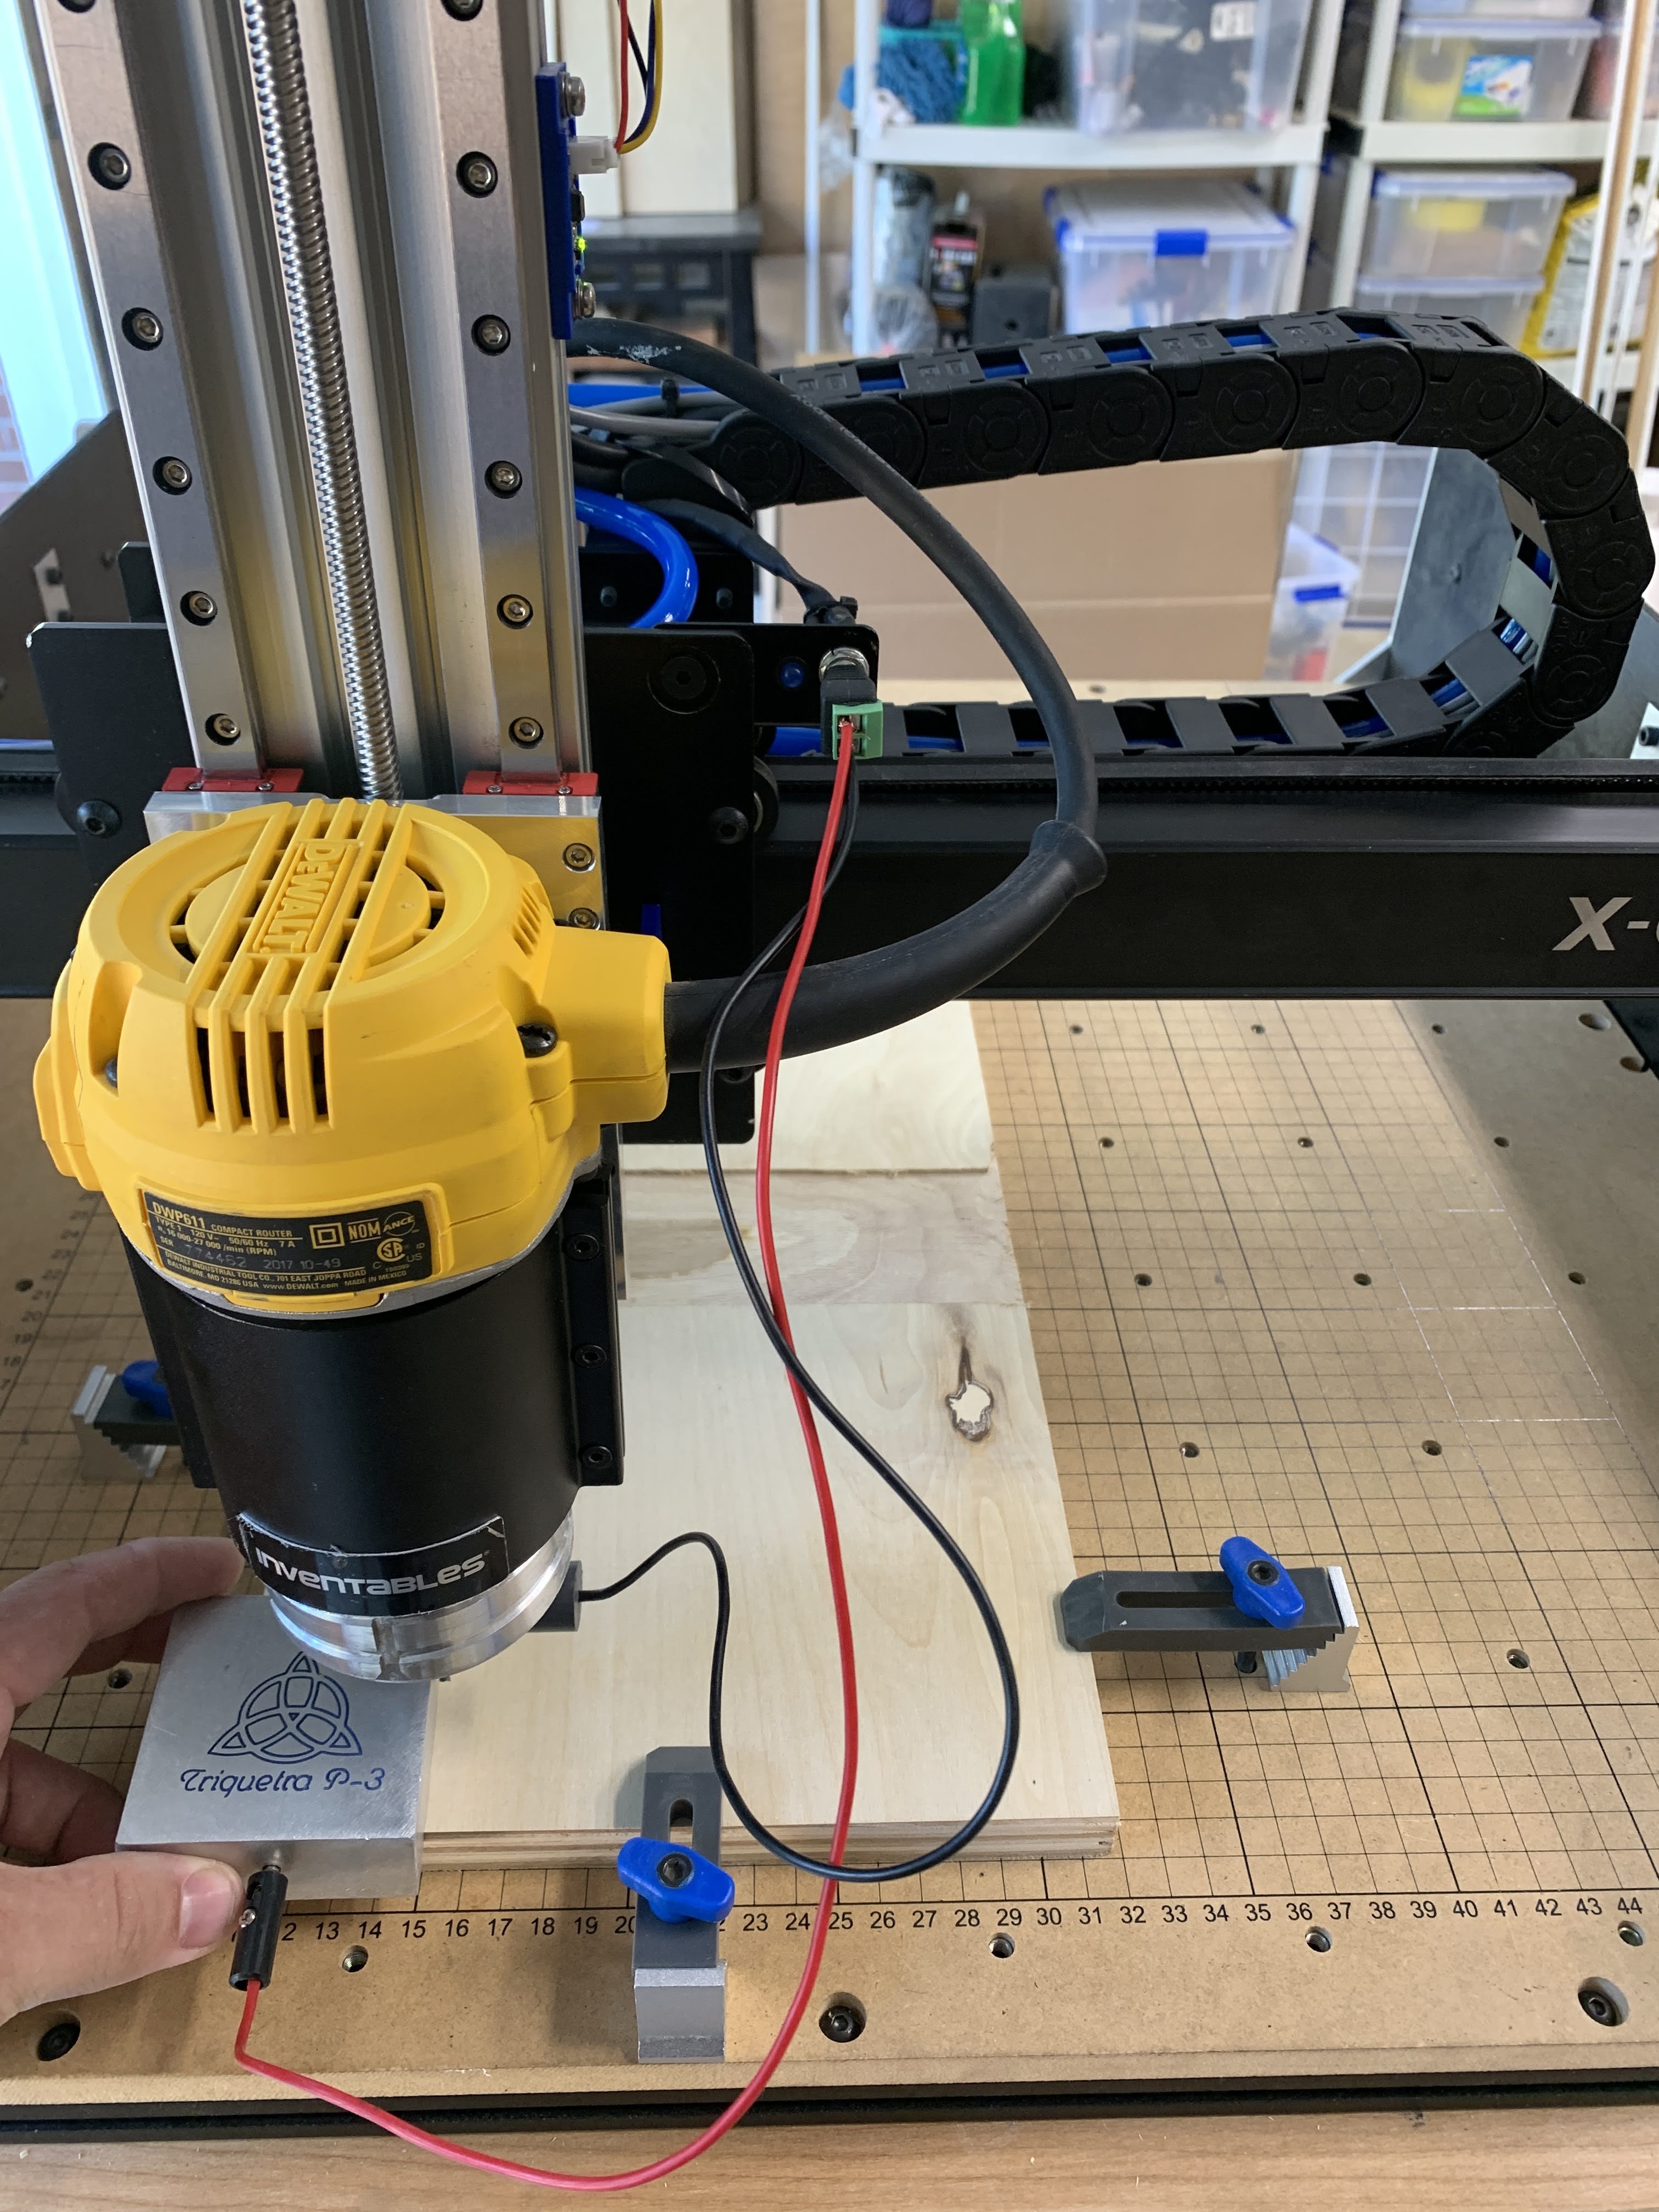
I have broken a few bits because the cncjs controller setup I have, doesn't have a probe status report. I build a little transistor circuit that monitors the probe status and lights an LED. The circuit is in a little project enclosure box, and I ran a wire through the gantries to have the LED next to the probe connector. This allows me to connect the probe, attach the magnet to the collet of the router, and then touch the plate to the bit by hand. If the LED goes off, I know that the probe has a good connection, and I have less chance of breaking the bit on a z-axis probe.
I also have upgraded my probe plate to the Triquetta 3-Axis Touch Plate. This is another great upgrade that has improved my quality of machined parts. The software, forums, and support from Triquetta are top-notch. This touch plate, combined with reliable limit switches for the homing cycle, makes it worry-free to change bits in the middle of a cut.

TBDCNC Upgrades
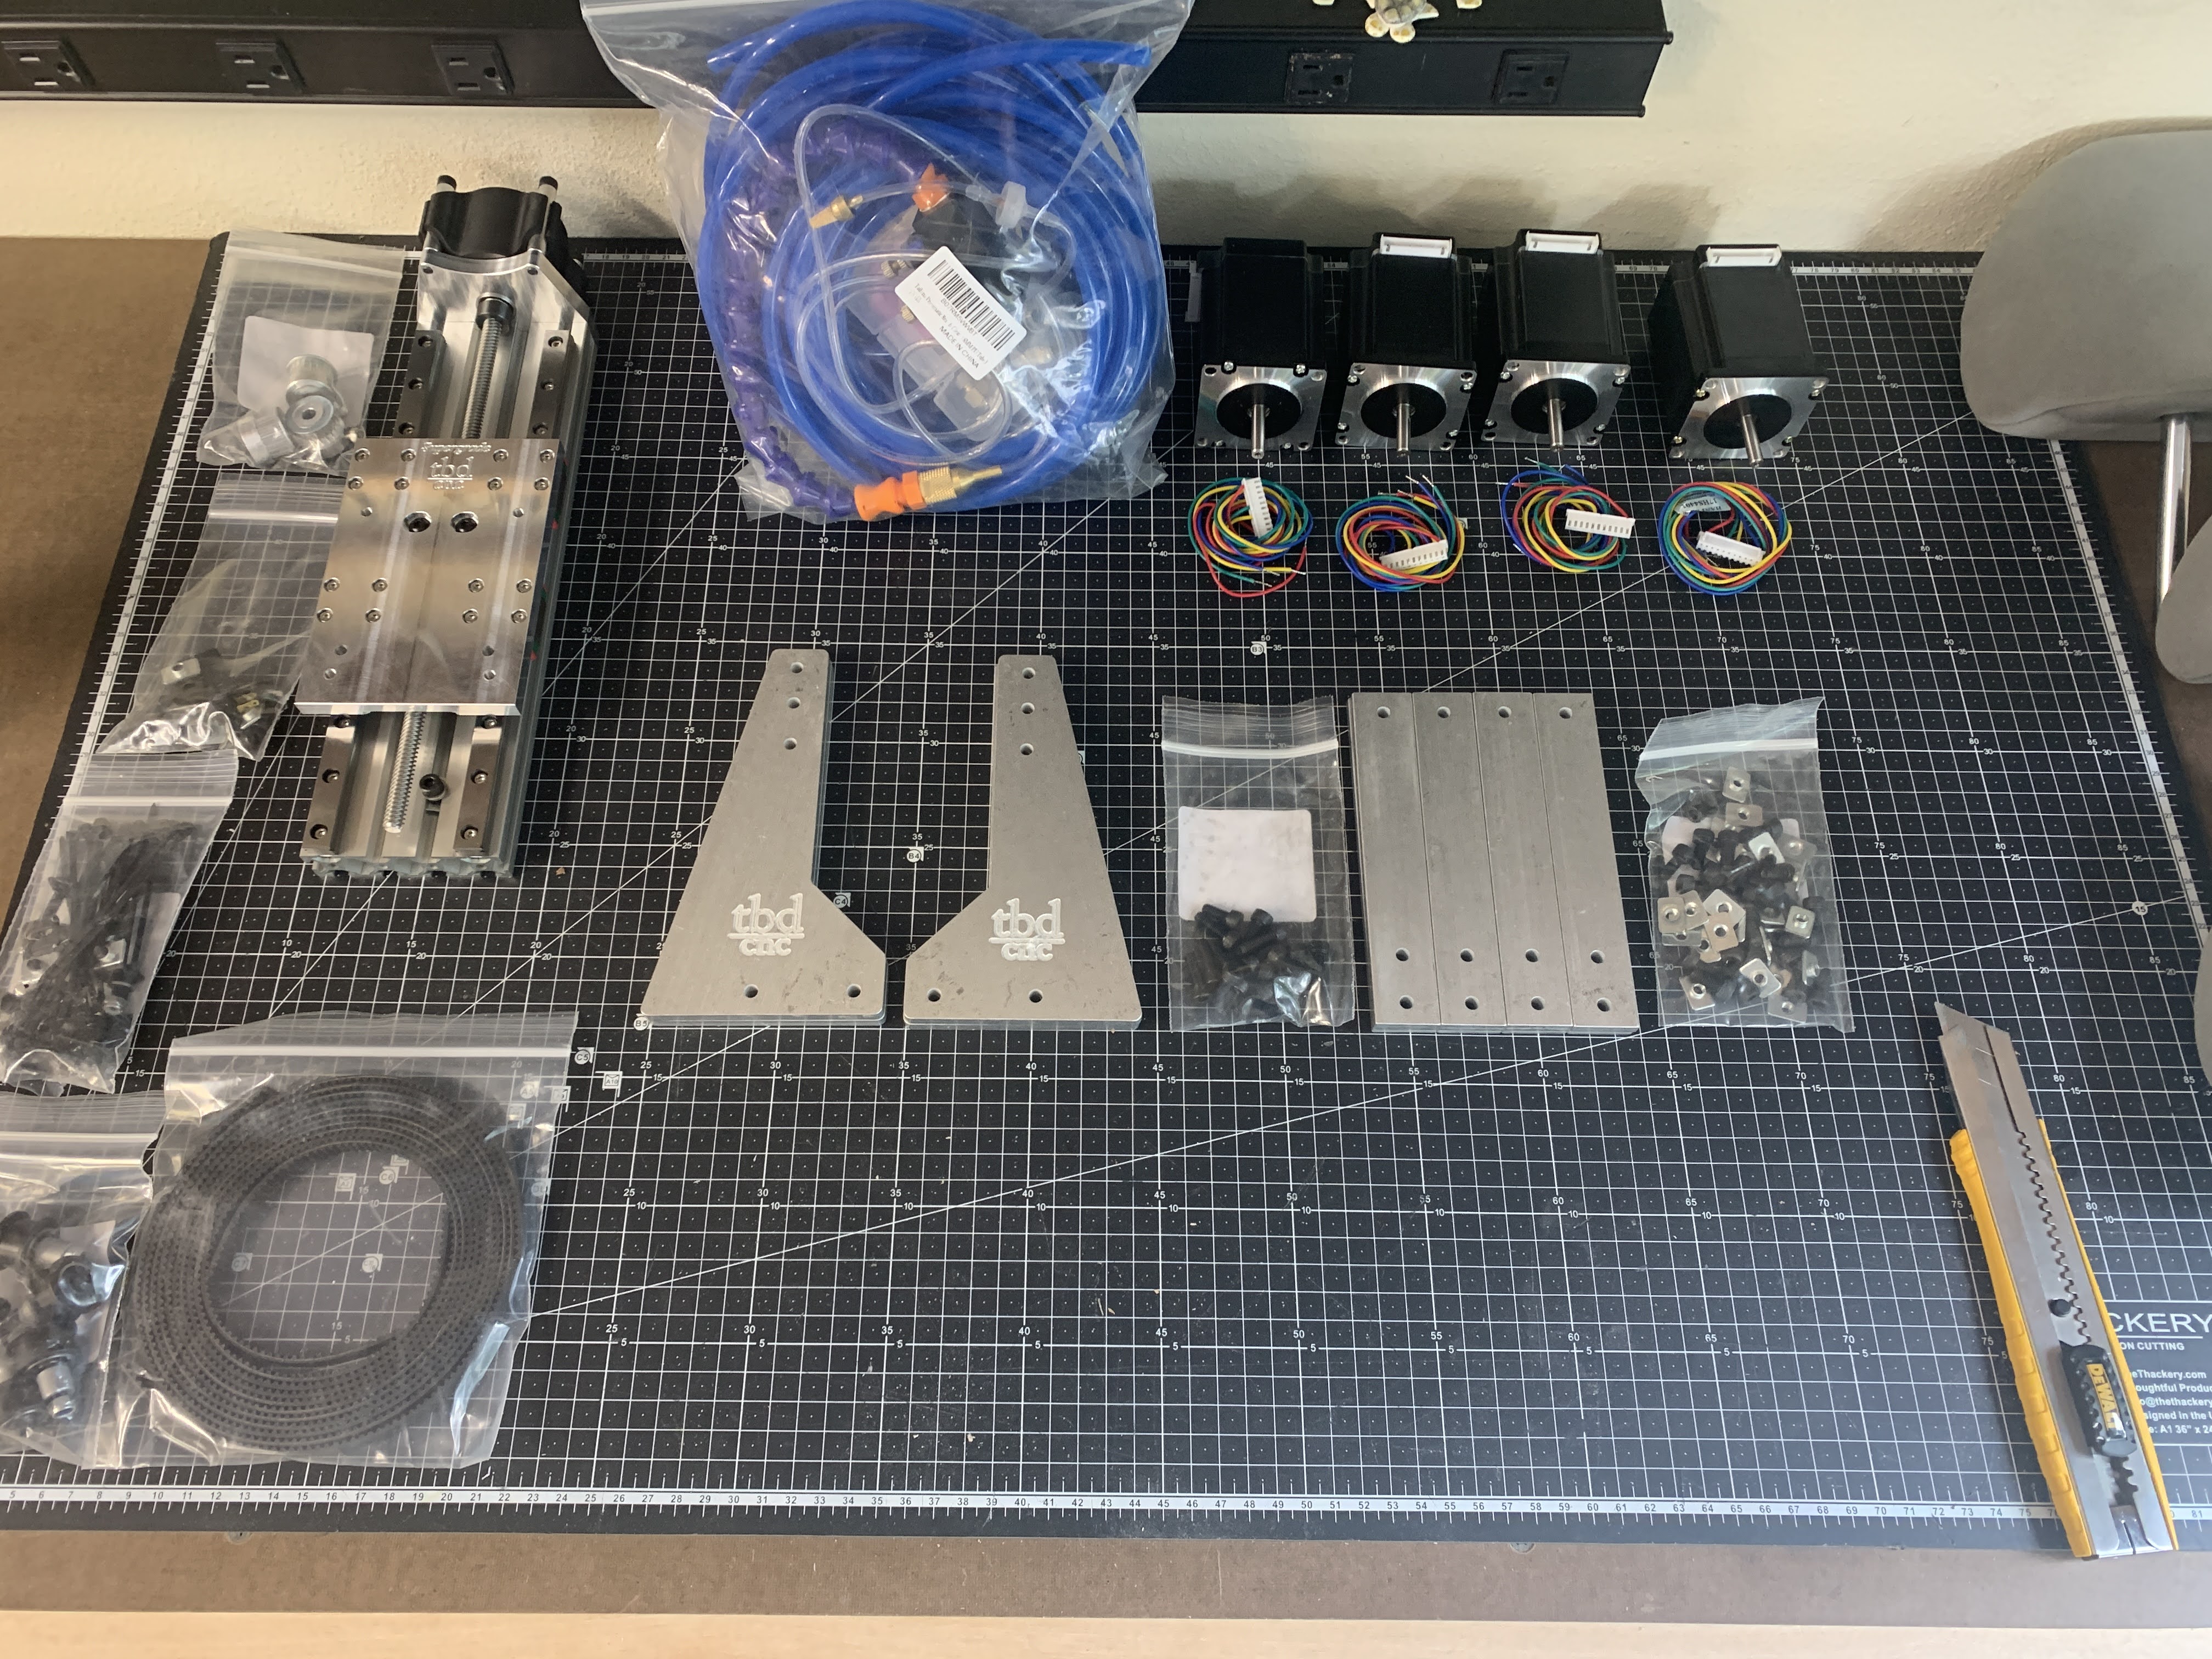
I purchased four upgrades kits from tbd cnc for my machine.
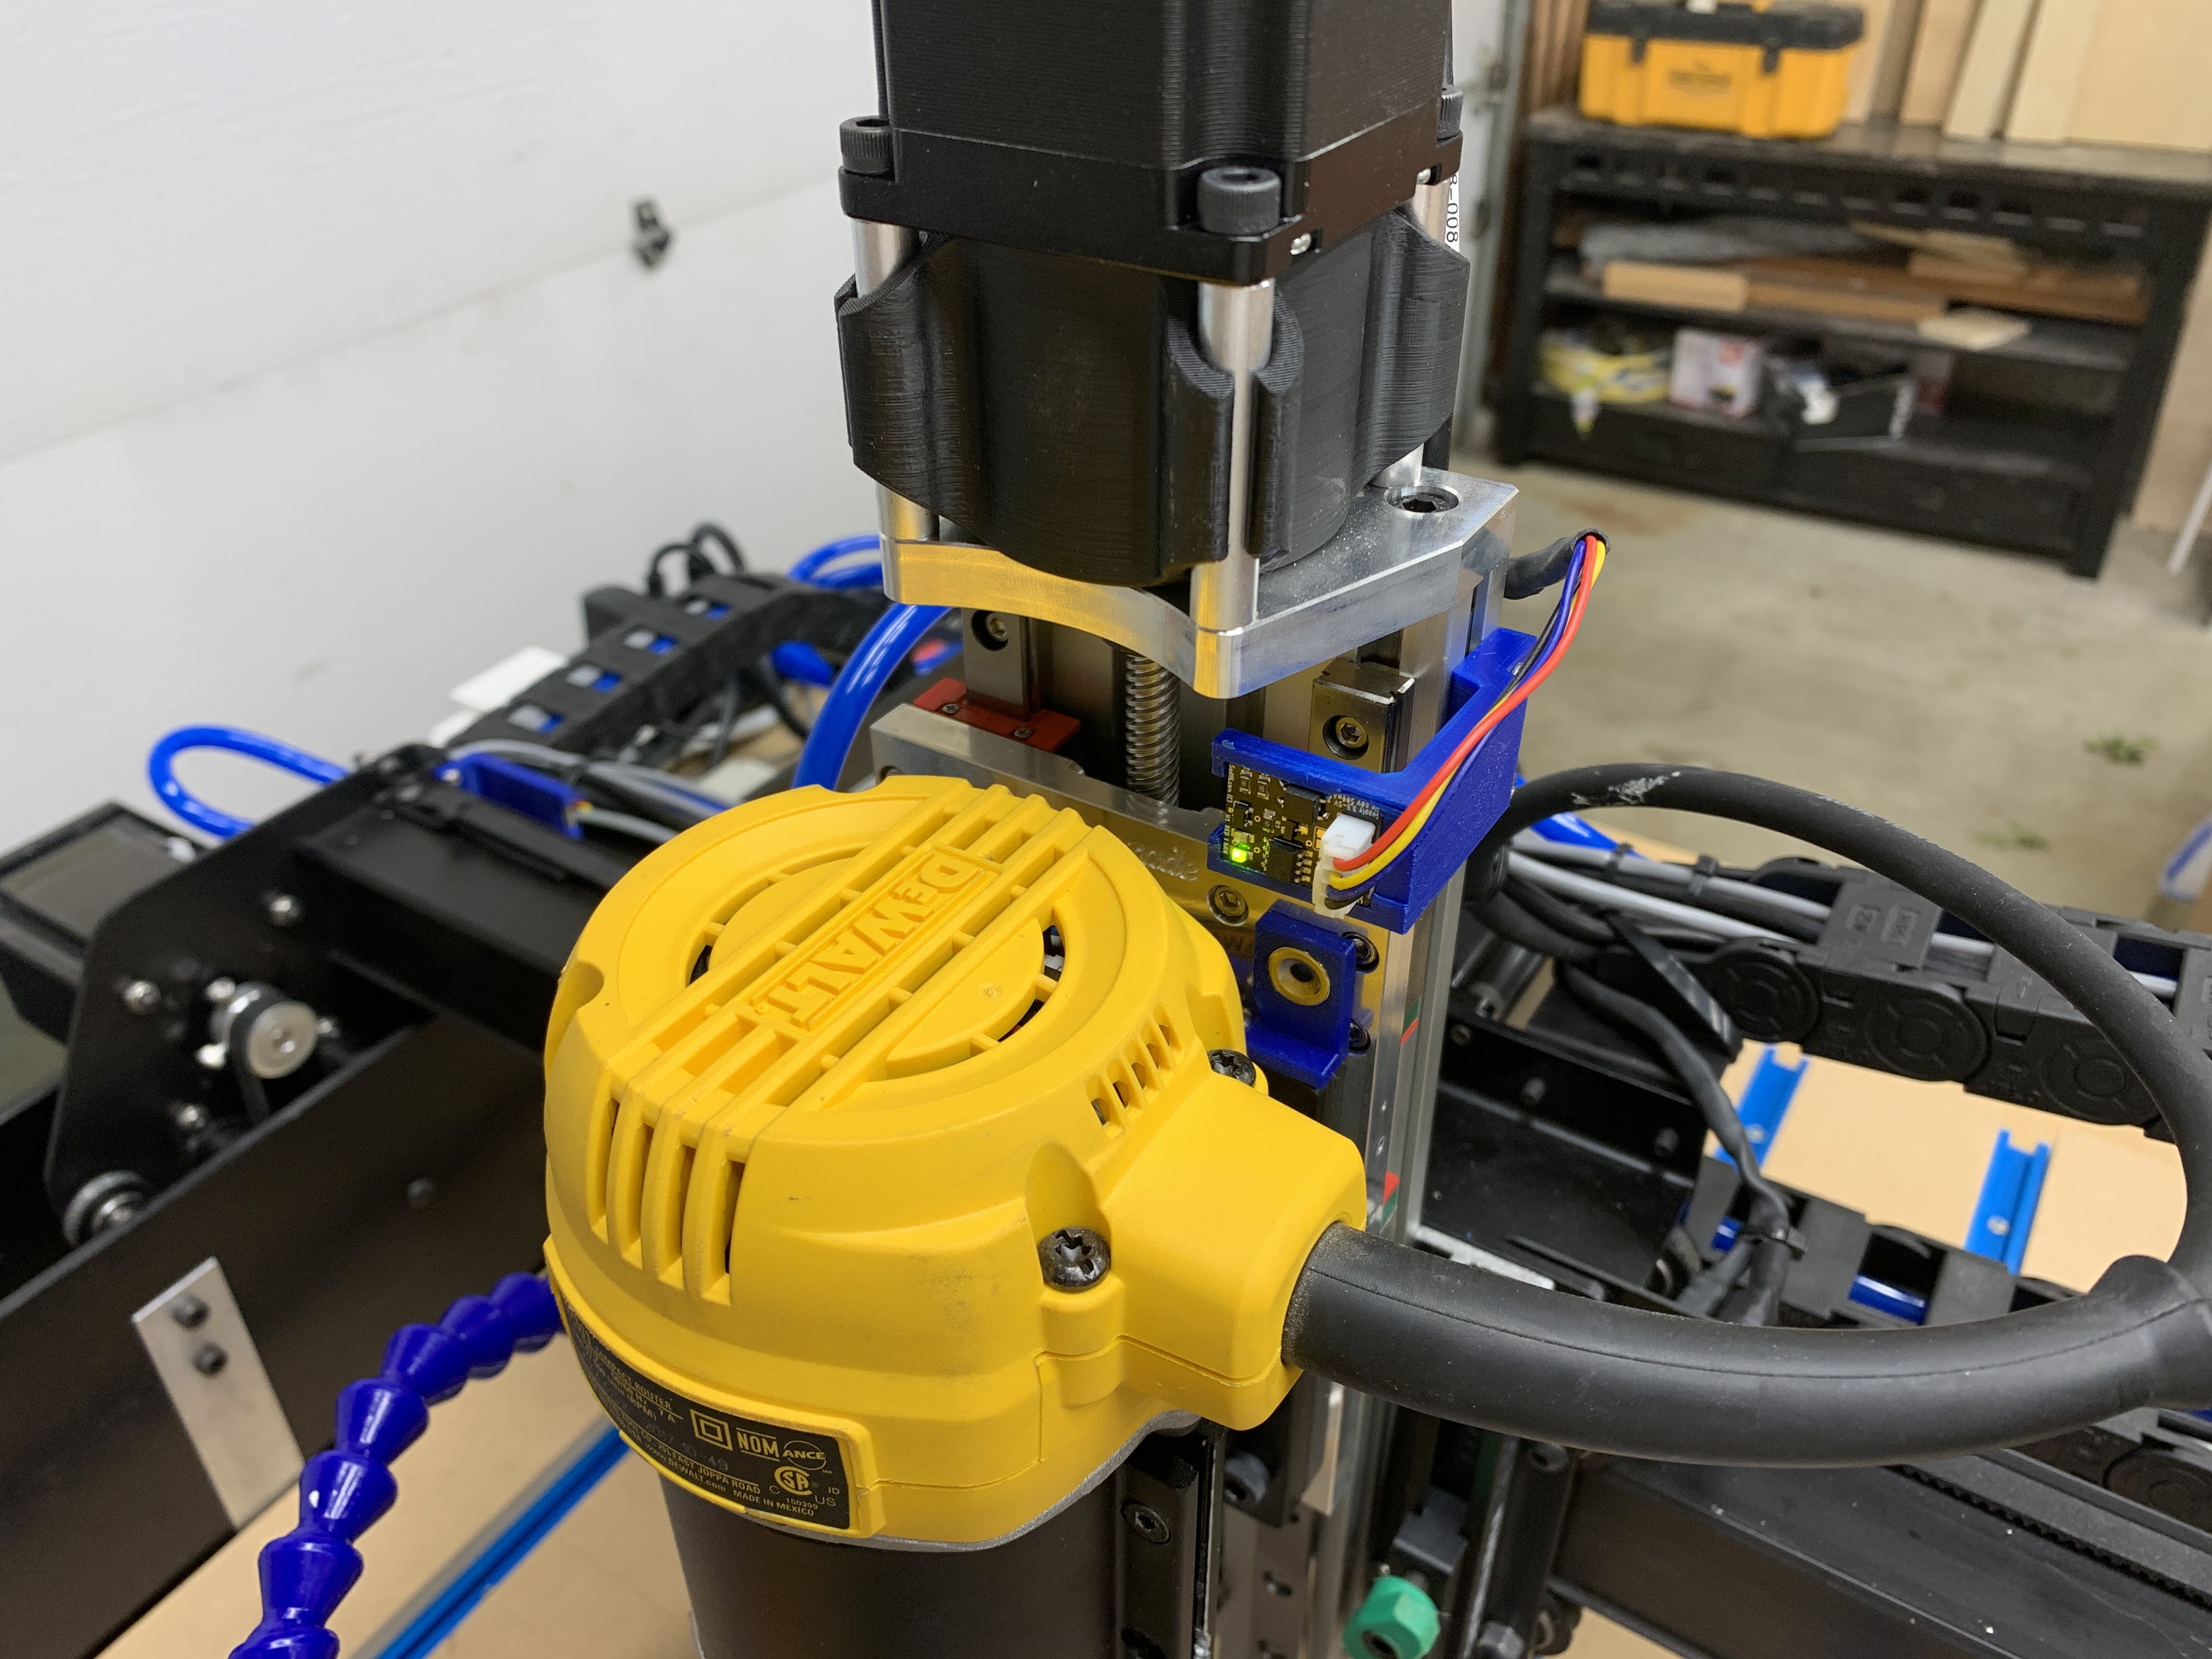
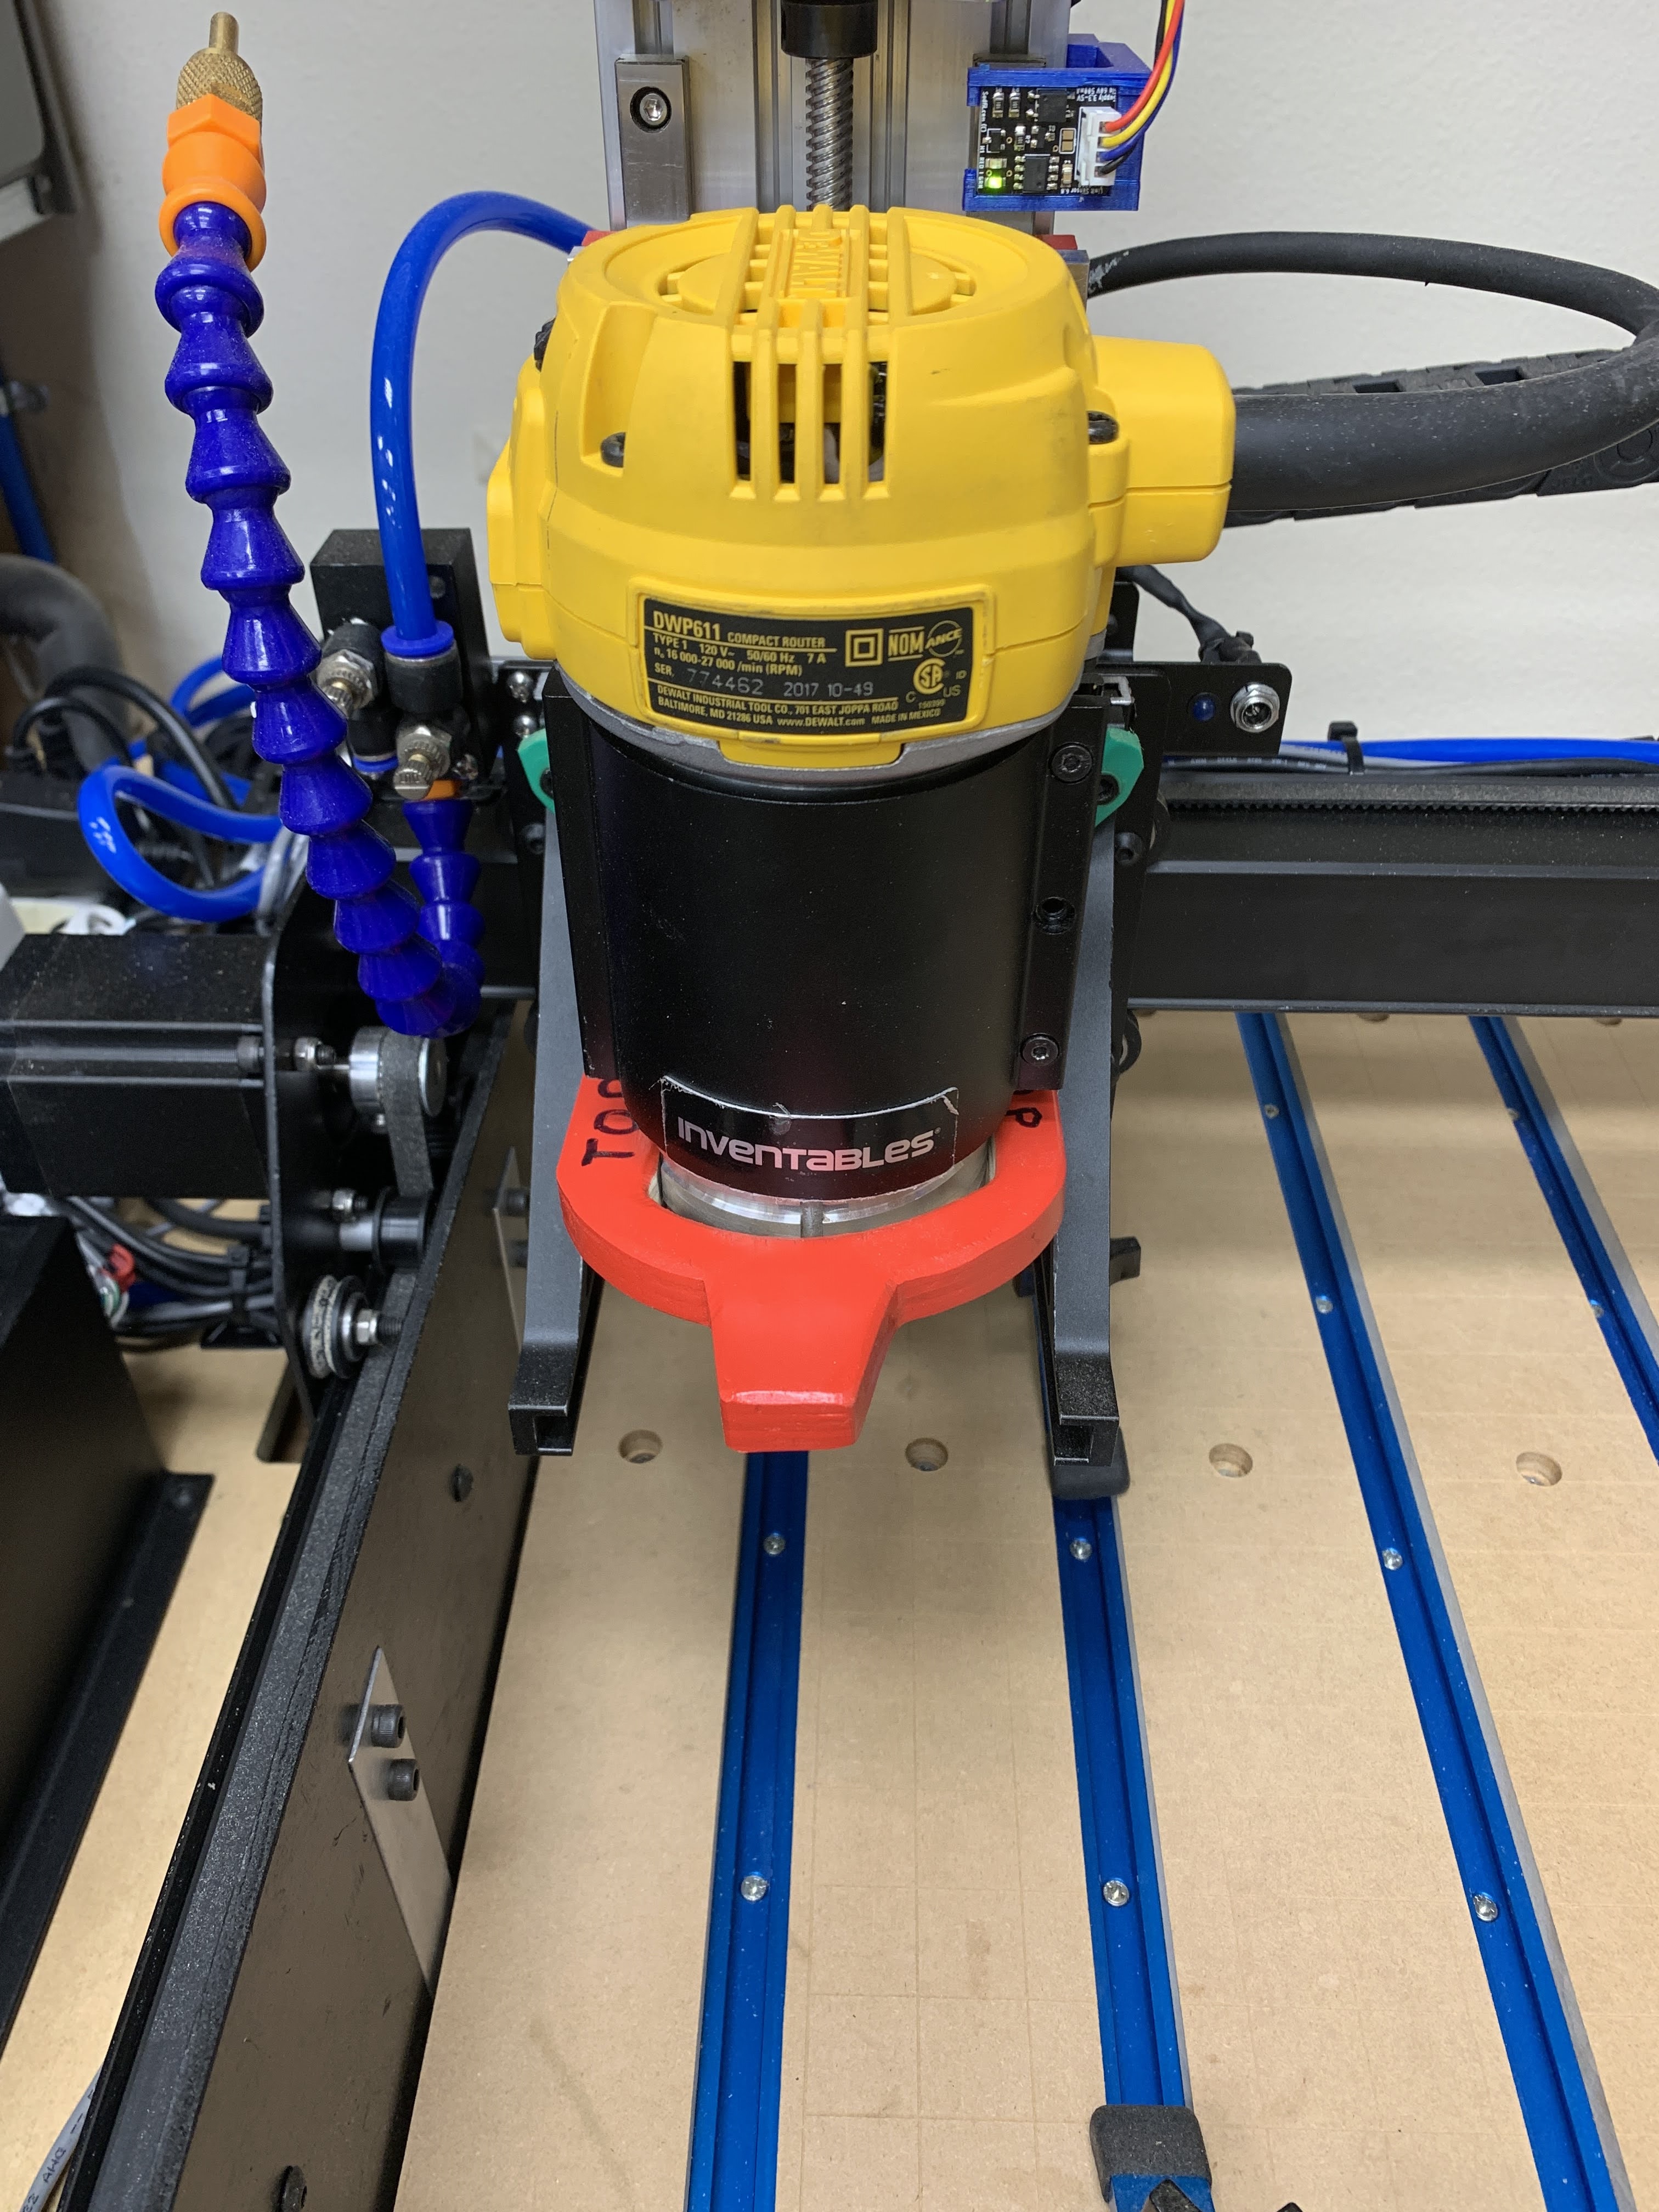
Supergrade DirectDrive Z A-axis. Well, this feels like the ultimate upgrade for my machine for a full 160mm z-axis travel! The quality from TBDCNC was amazing, and it was easy enough to install and setup in firmware. It did not require any special modifications to my machine or troubleshooting, except for the Y-axis risers to make use of this new height. Once installed, my existing router mount connected right to the carriage. I used my calipers and some machinist squares to align everything up.
I went with the 2" risers with 4 per side stiffeners as well. These are very well made and were easy enough to install. I also cut out a 1/8" plywood dust gauge around these plates, which did take some time as I manually cut these out on the bandsaw.
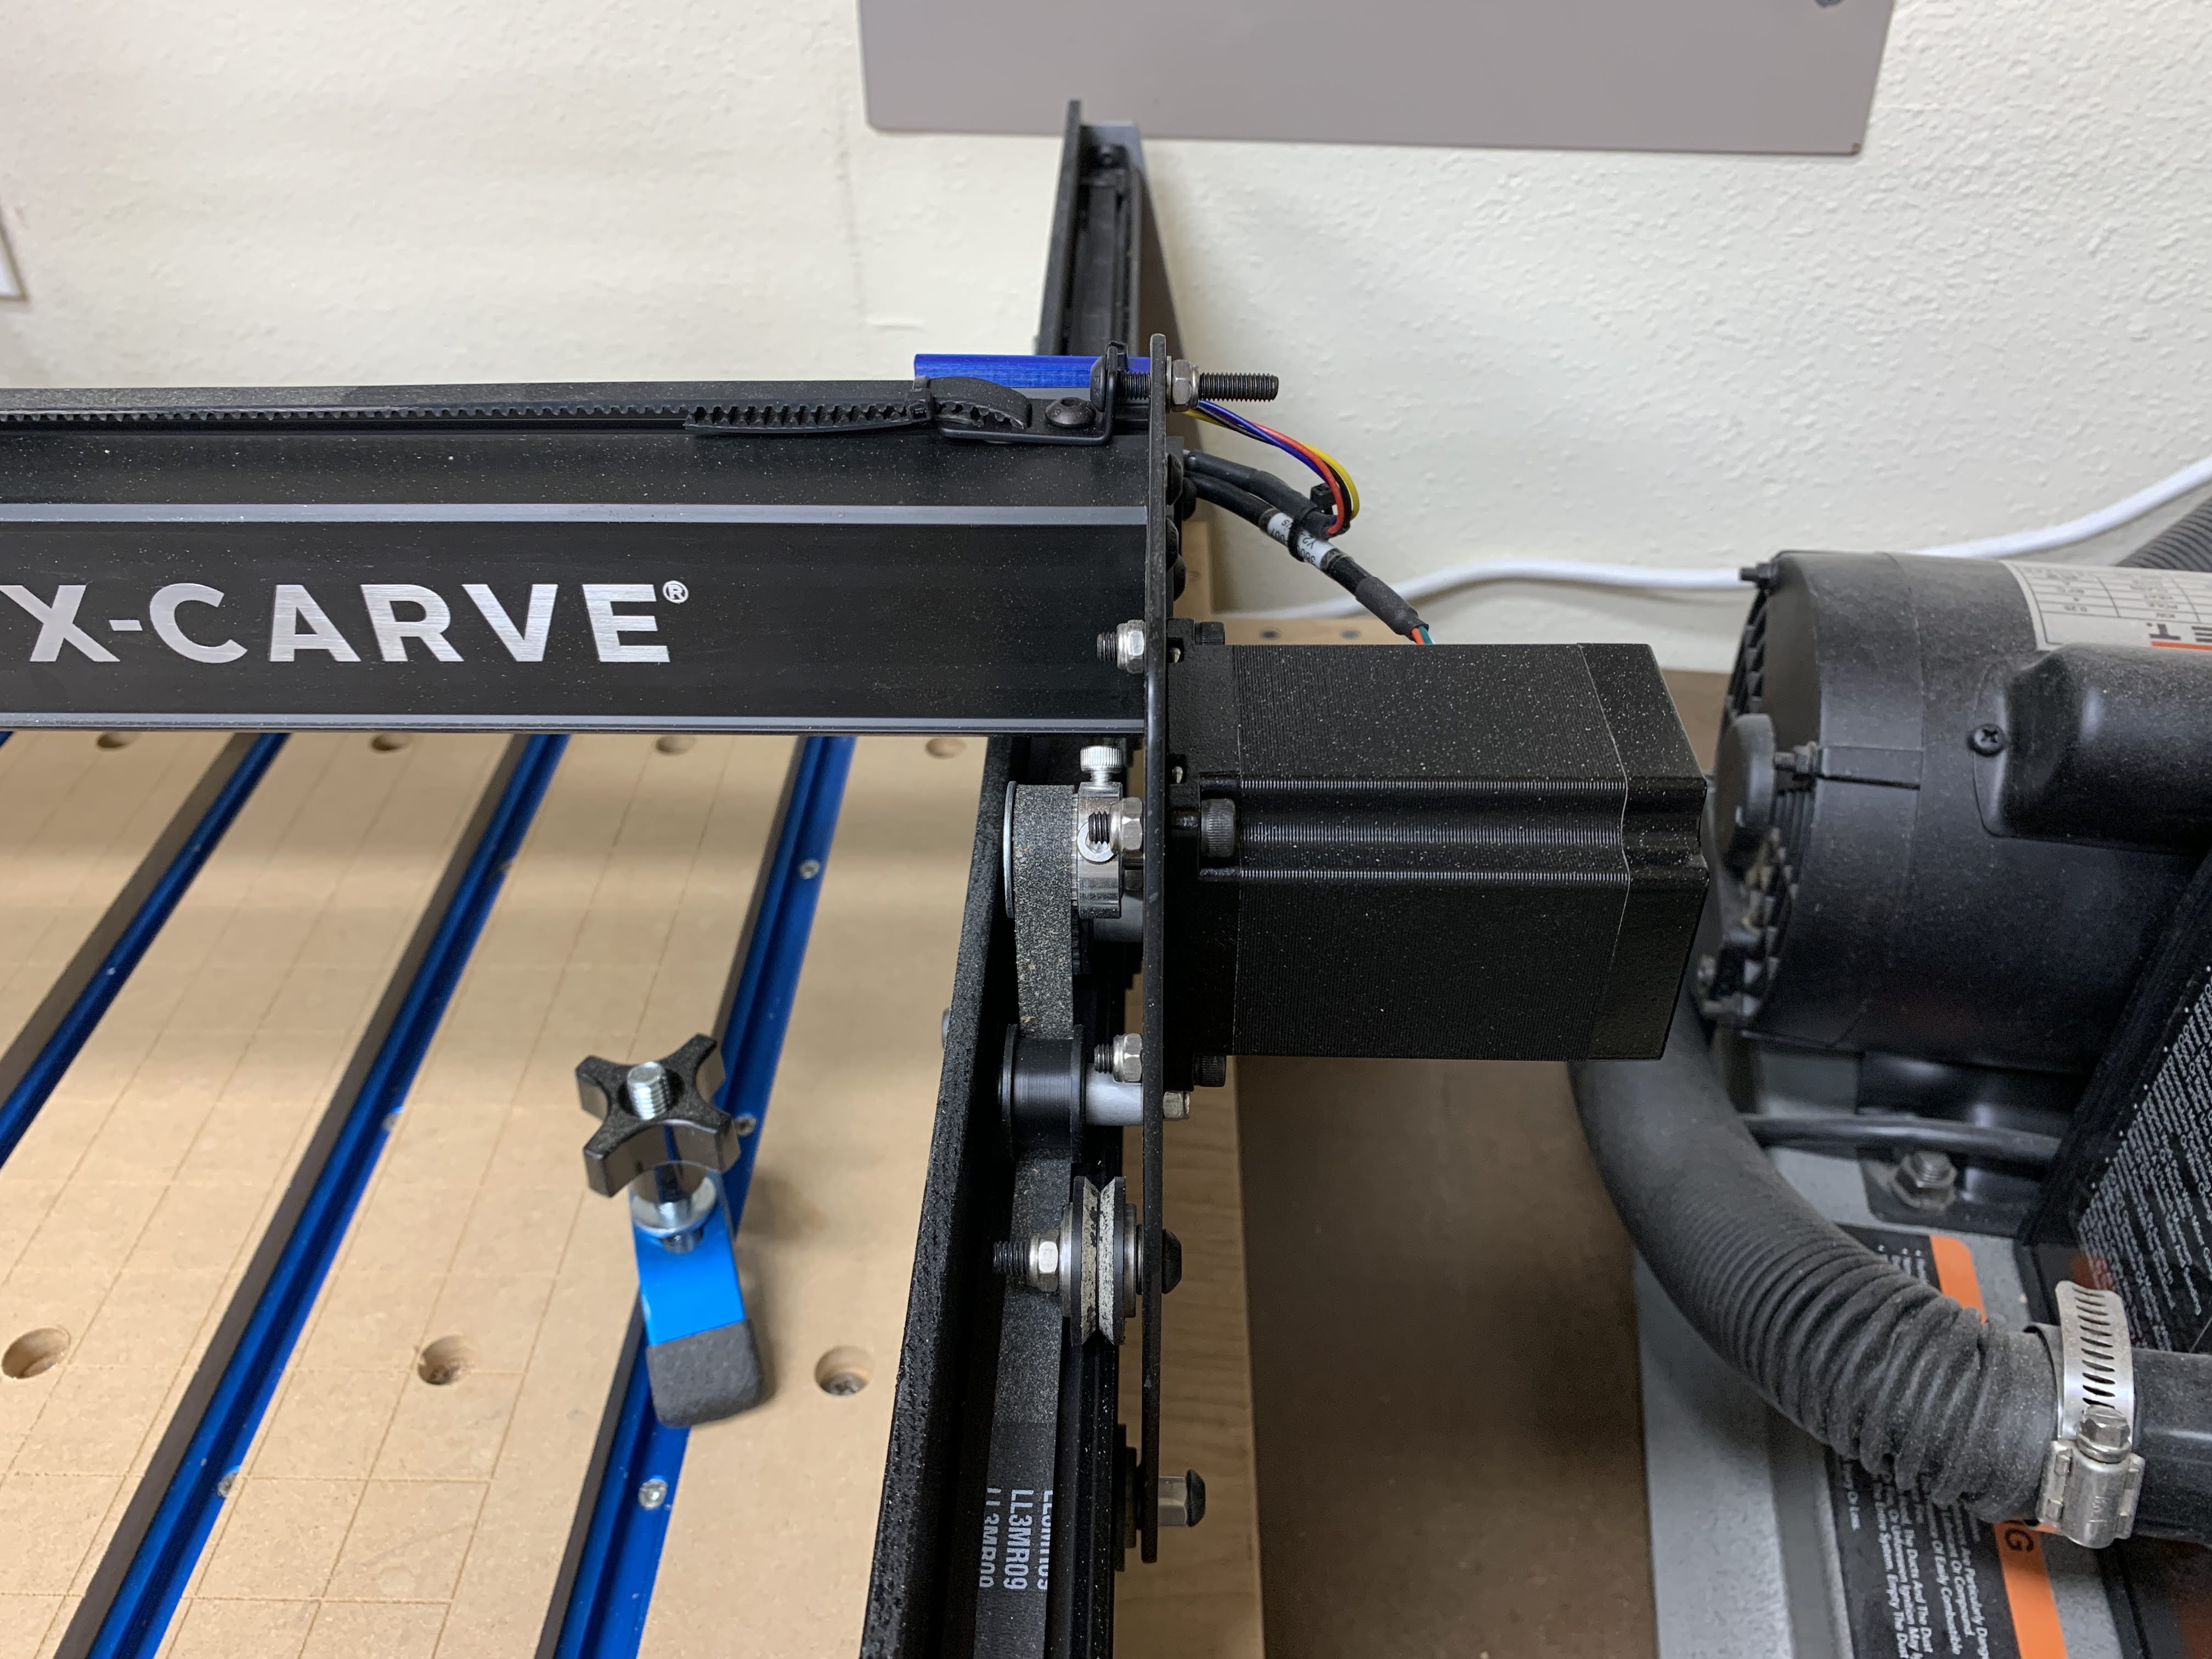
269oz NEMA 23 Steppers for X-Axis and Y-Axis. I am still a little undecided on these because of the changes with the motors and belts. My steps per mm were drastically reduced, and the machine's overall tolerance is theoretically less. However, it's still beyond any cuts or accuracy that I need.
3GT 9mm, gears, and pulleys. One side note is that I did lose about 8mm of X-Axis and Y-Axis travel on my machine because of the zip ties / doubled-up belts at the belt clips. The V-Wheels on the carriages will interfere with the zip ties. My machine went from 520mm before the upgrade to 512mm. A little disappointing, but still liveable. Overall I am happy with the upgrade and feel the machine is stronger; thats just a feeling, though.

Controller Setup
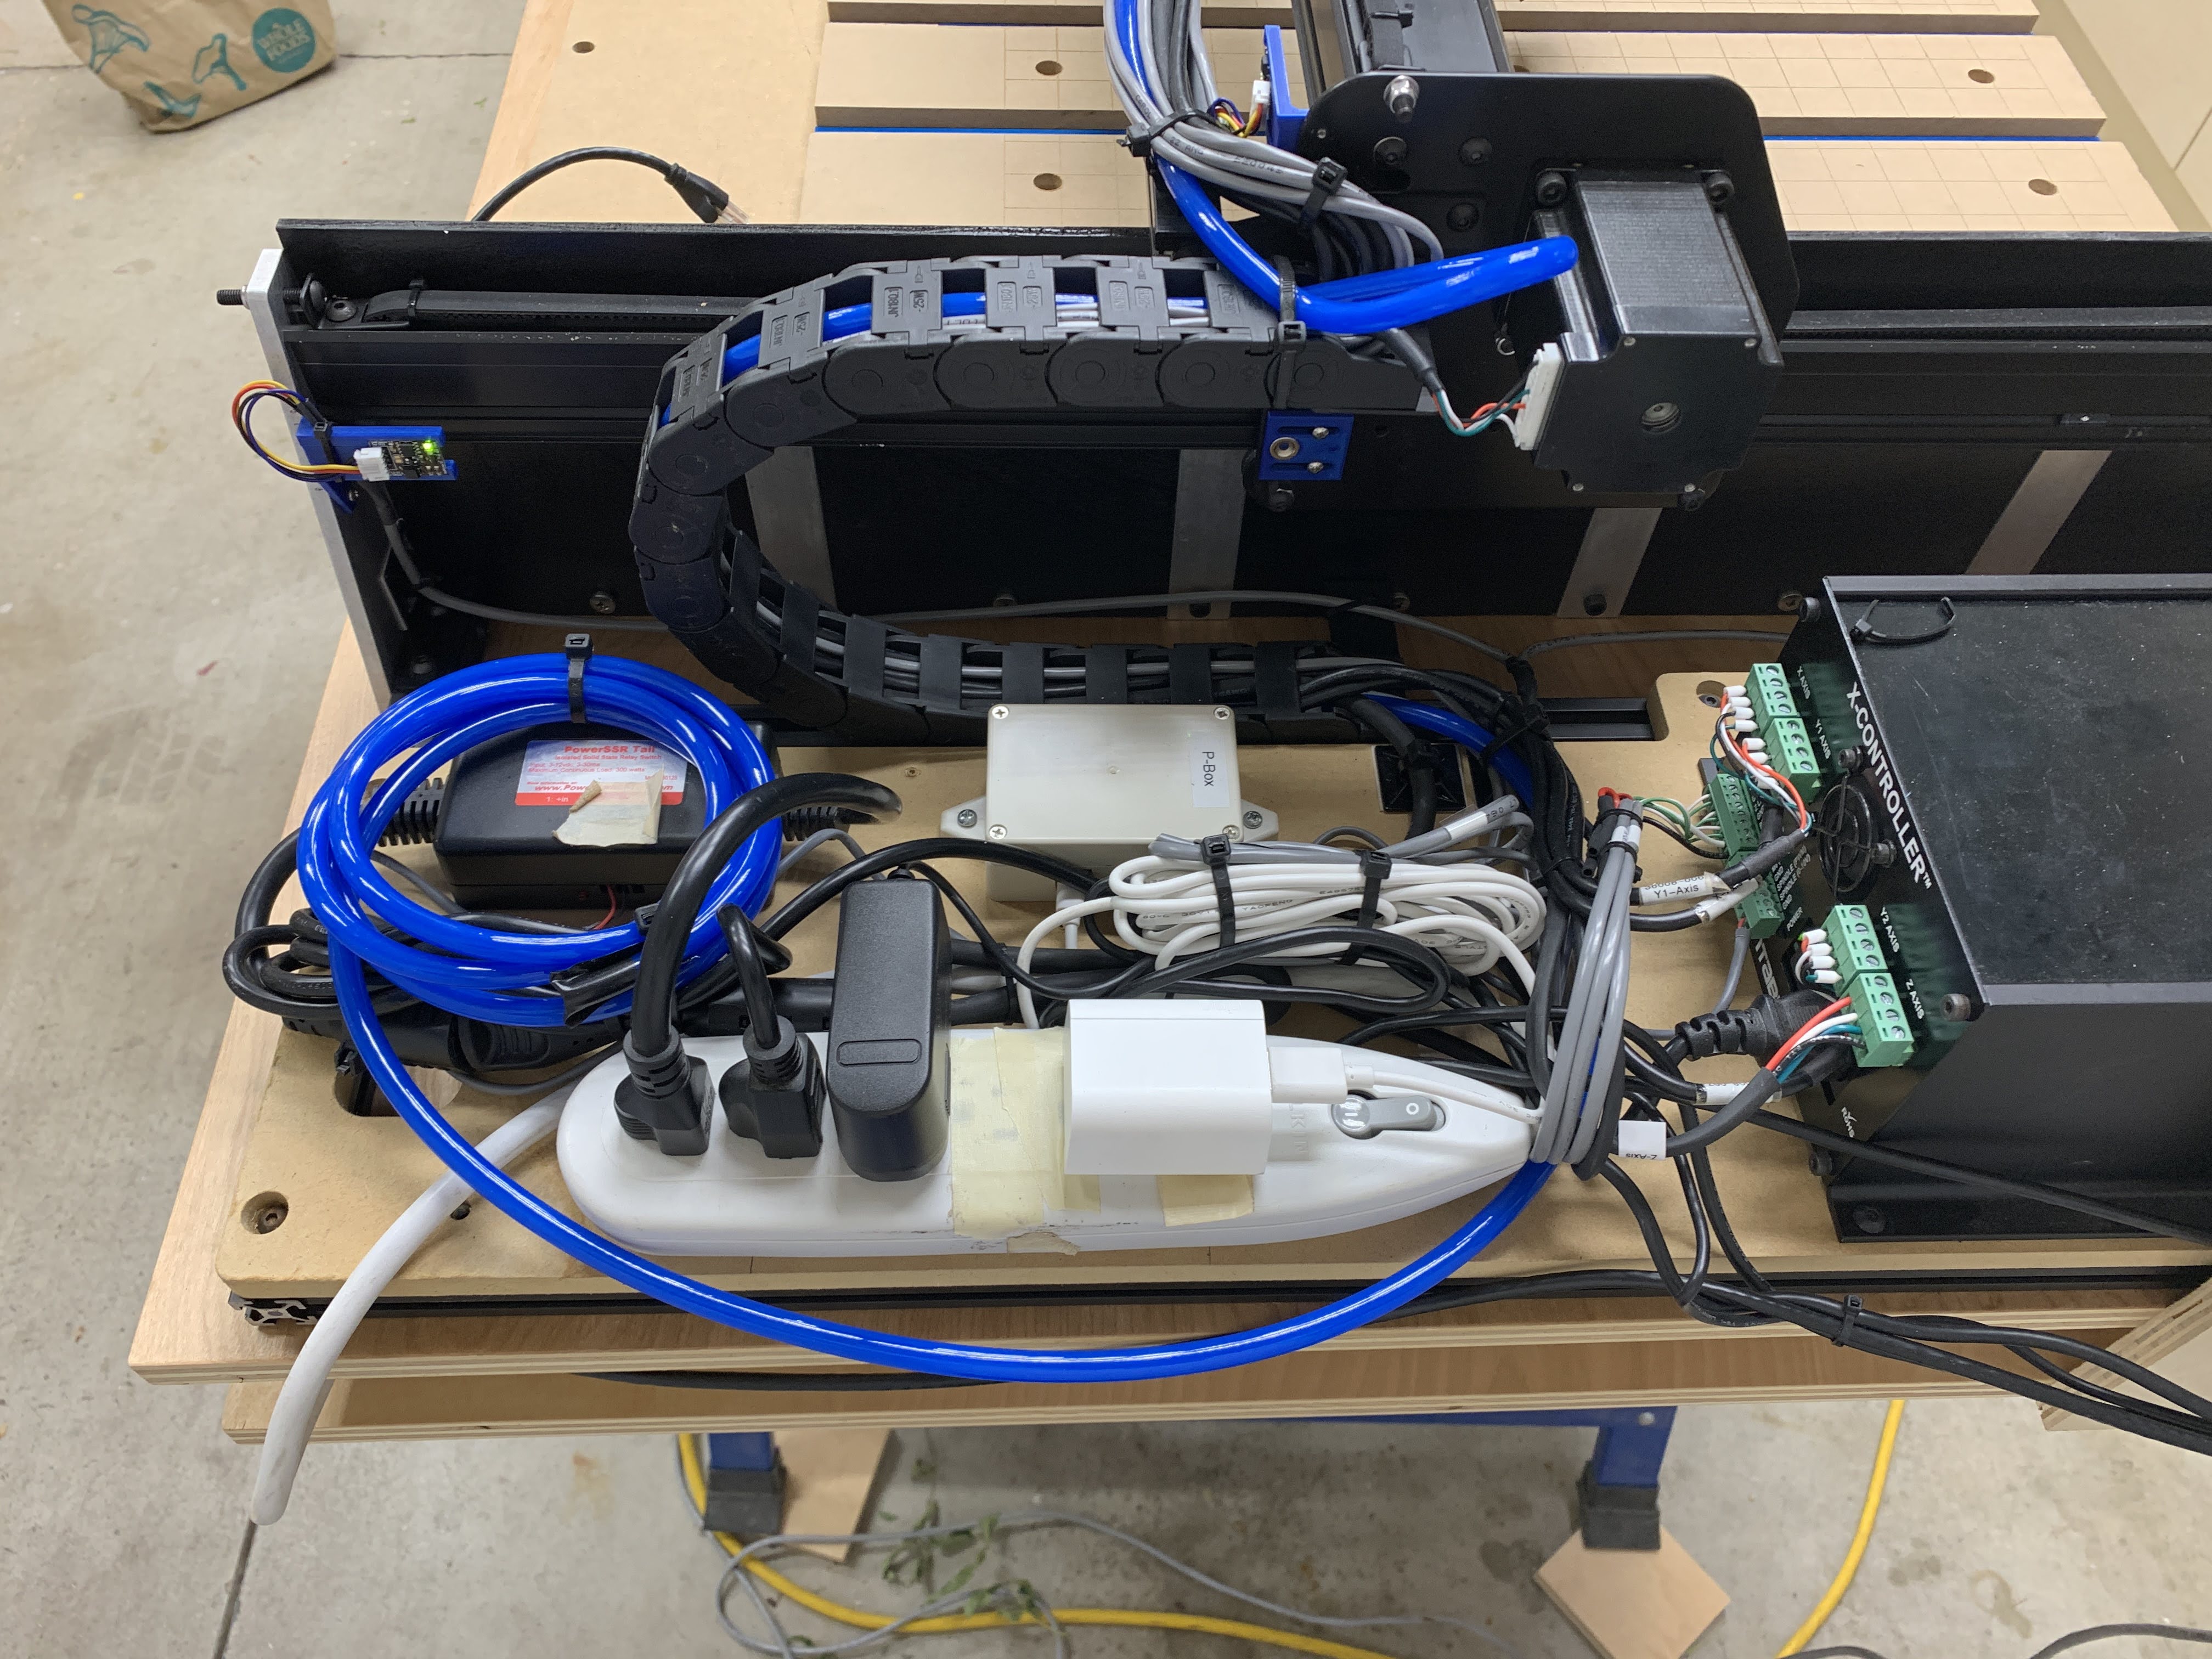
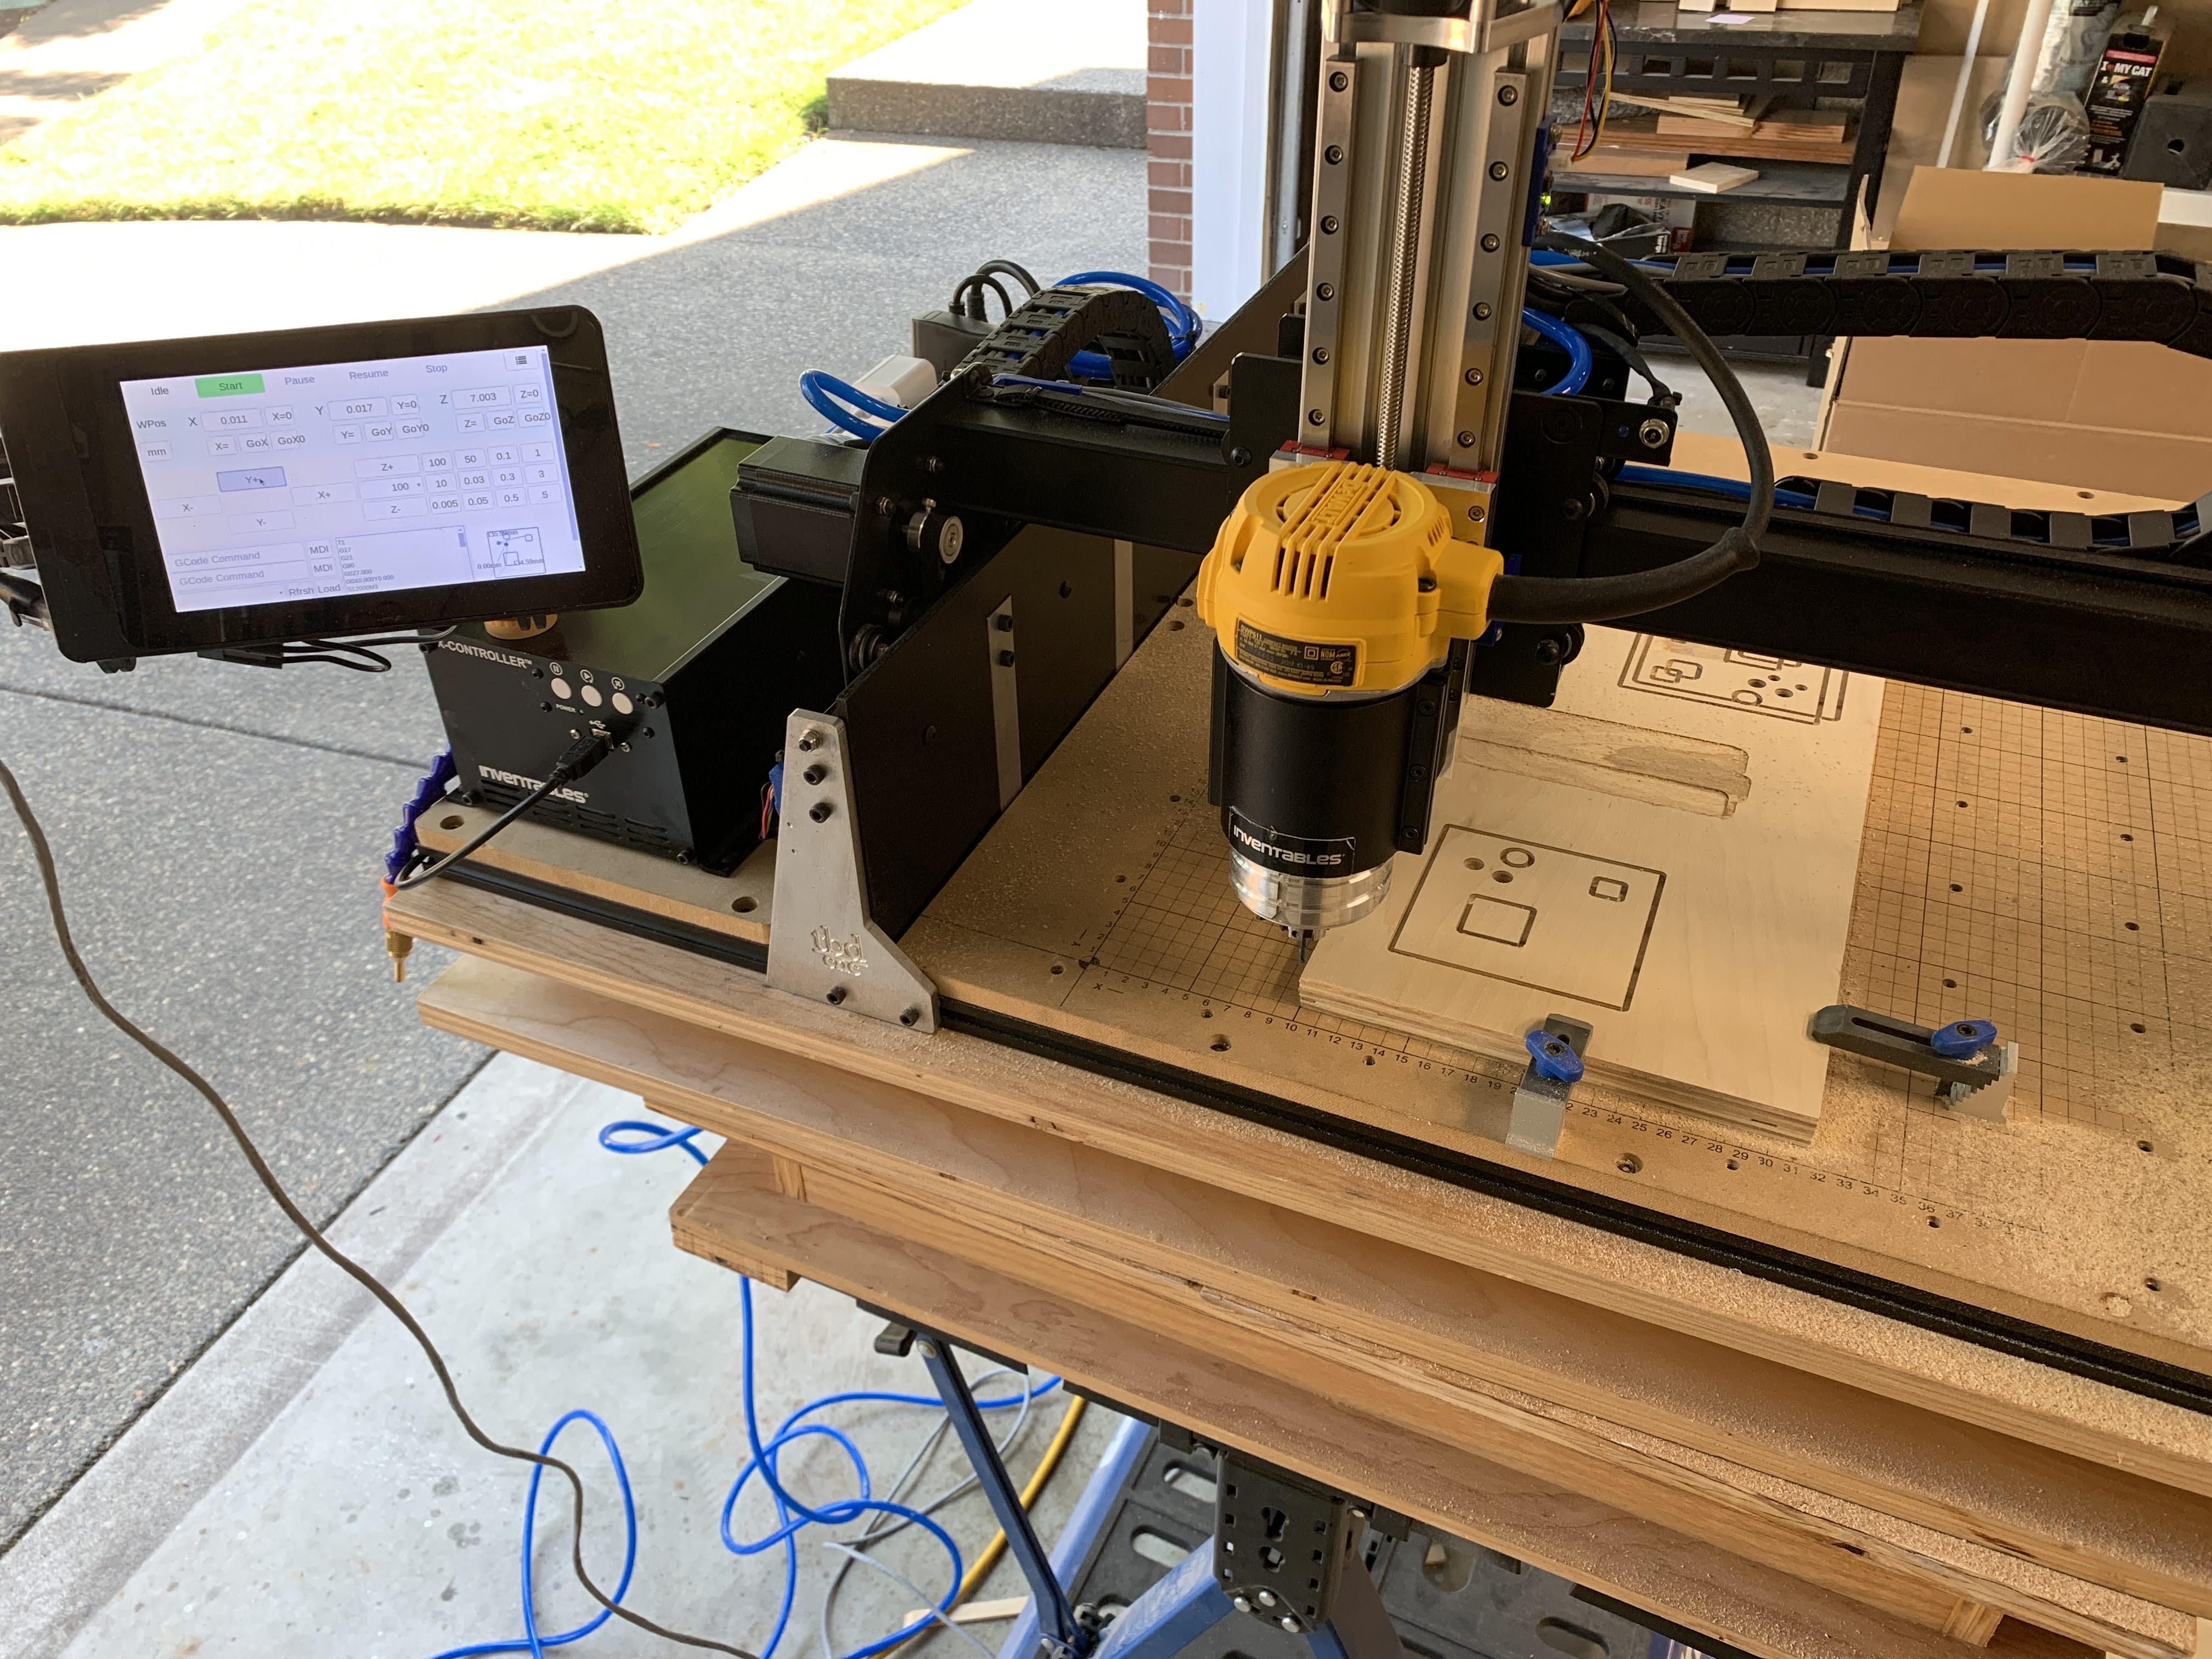
I am using the stock x-controller from inventables. I have not connected this machine to easel since 2017. I keep the firmware upgrade by flashing it with Arduino. I usually keep the inventables grbl branch installed, as it doesn't lag too far behind the grbl releases. Although I suspect there is little reason to keep the inventables form.
I have installed a raspberry pi 3 with the official 7" touchscreen. I have the pi and tablet installed into a SmartPi Touch case, which has VESA mount holes. I have that attached to a cheap small monitor arm to keep it looking nice and clean looking (not dust free, however).
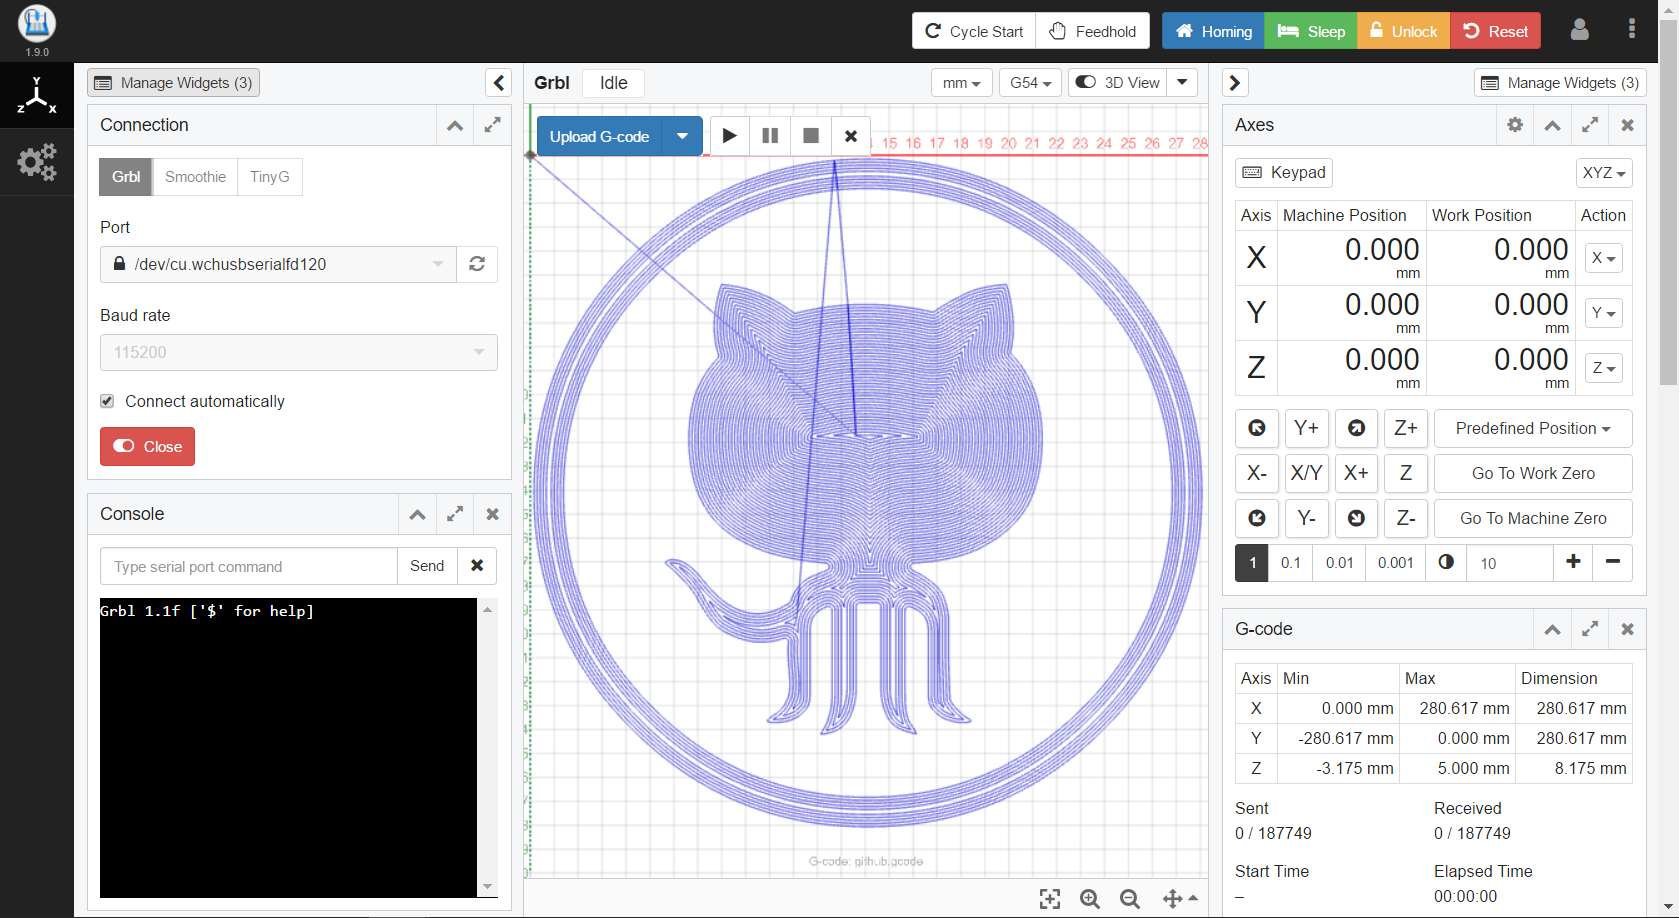
For the g-code sender, I am using cncjs on the raspi configured to display the tablet plugin on the touchscreen. For loading the gcode files, I will use my shop computer connected to the pi's cncjs server.
I have added a webcam so that I can monitor the cut if I am away. However, I don't use this, as I am not comfortable leaving the machine operating in my garage without me being there. Although it hasn't happened to me, I have seen pictures of fires happening from bad crashes / gcode.
I have also added a logic controlled power switch to the router and wired it to the spindle control pin on the x-controller so the g-code can turn on and off the router.


Miscellaneous
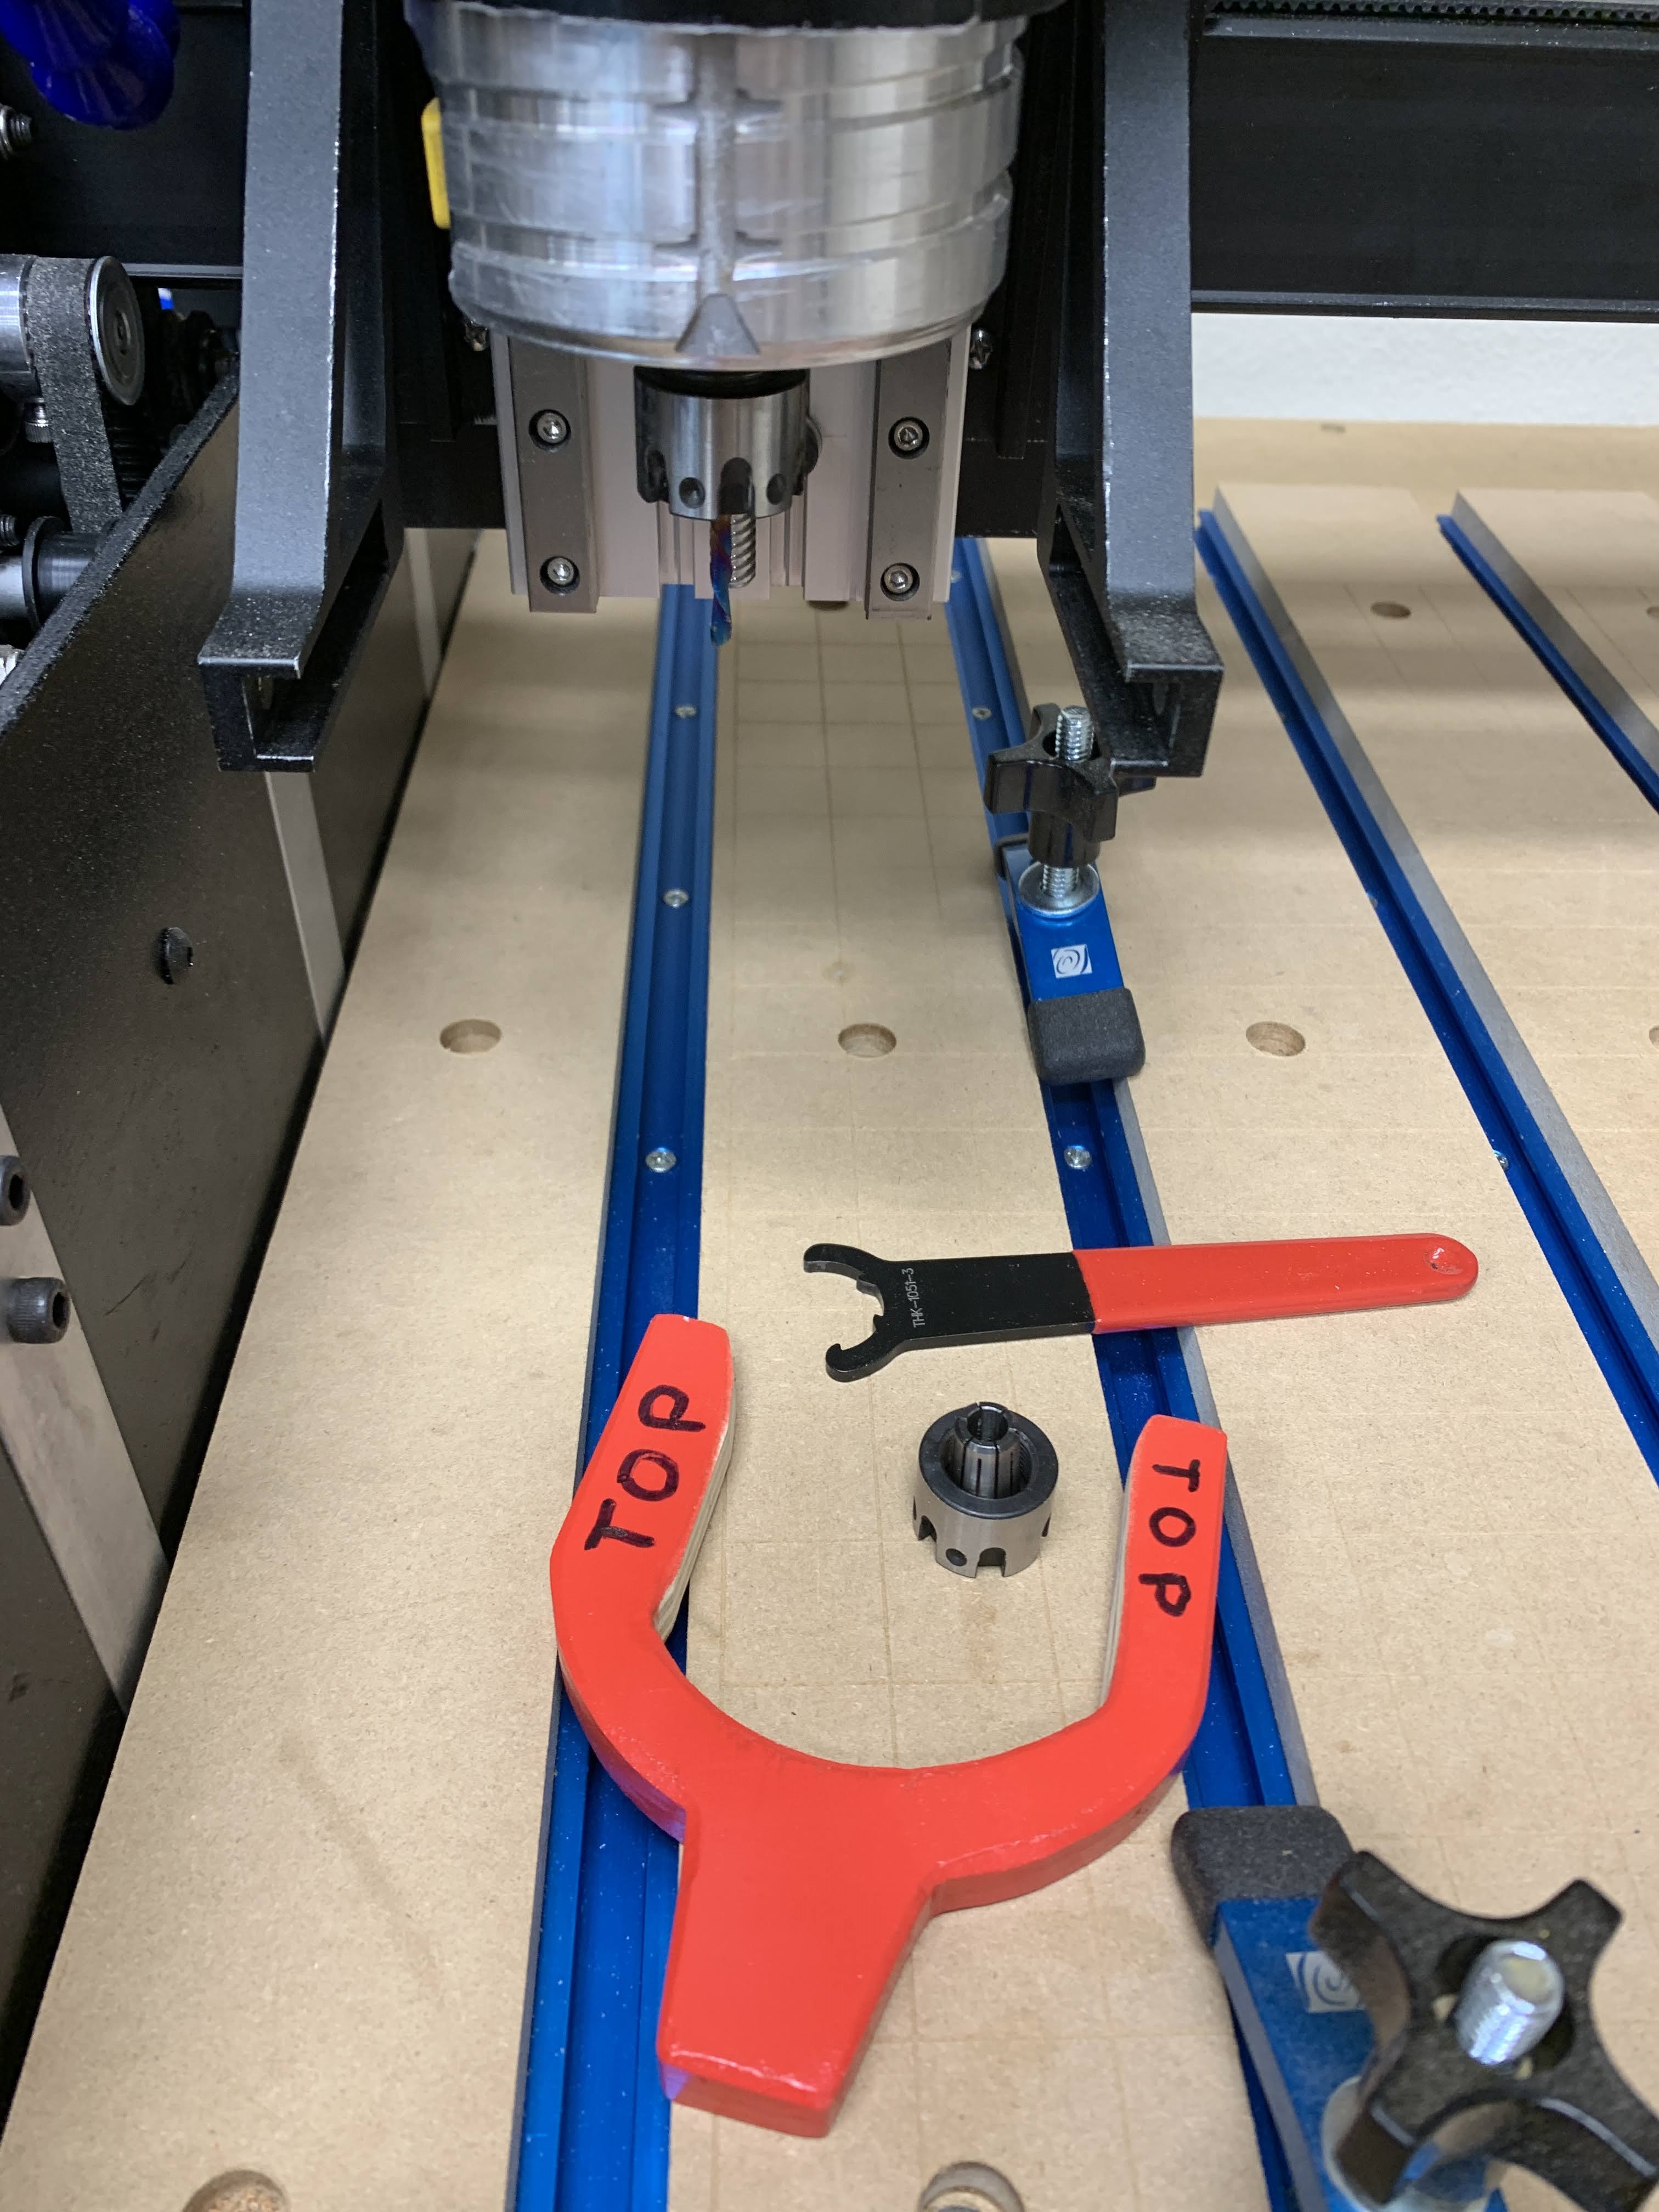
A built a simple little fixture that I can slide over the router to lock the shaft in place to loosen and tighten the collet. I painted it red to try and help me remember to remove it. I could quickly burn up my motor if I leave the shaft locked and power on the router. For the actual collet, I have upgraded to a percisebits.com DeWalt precision collet's for both a 1/8" and 1/4" collet, which I love. I had great support from percisebits when I had some questions about different versions of the wrench.
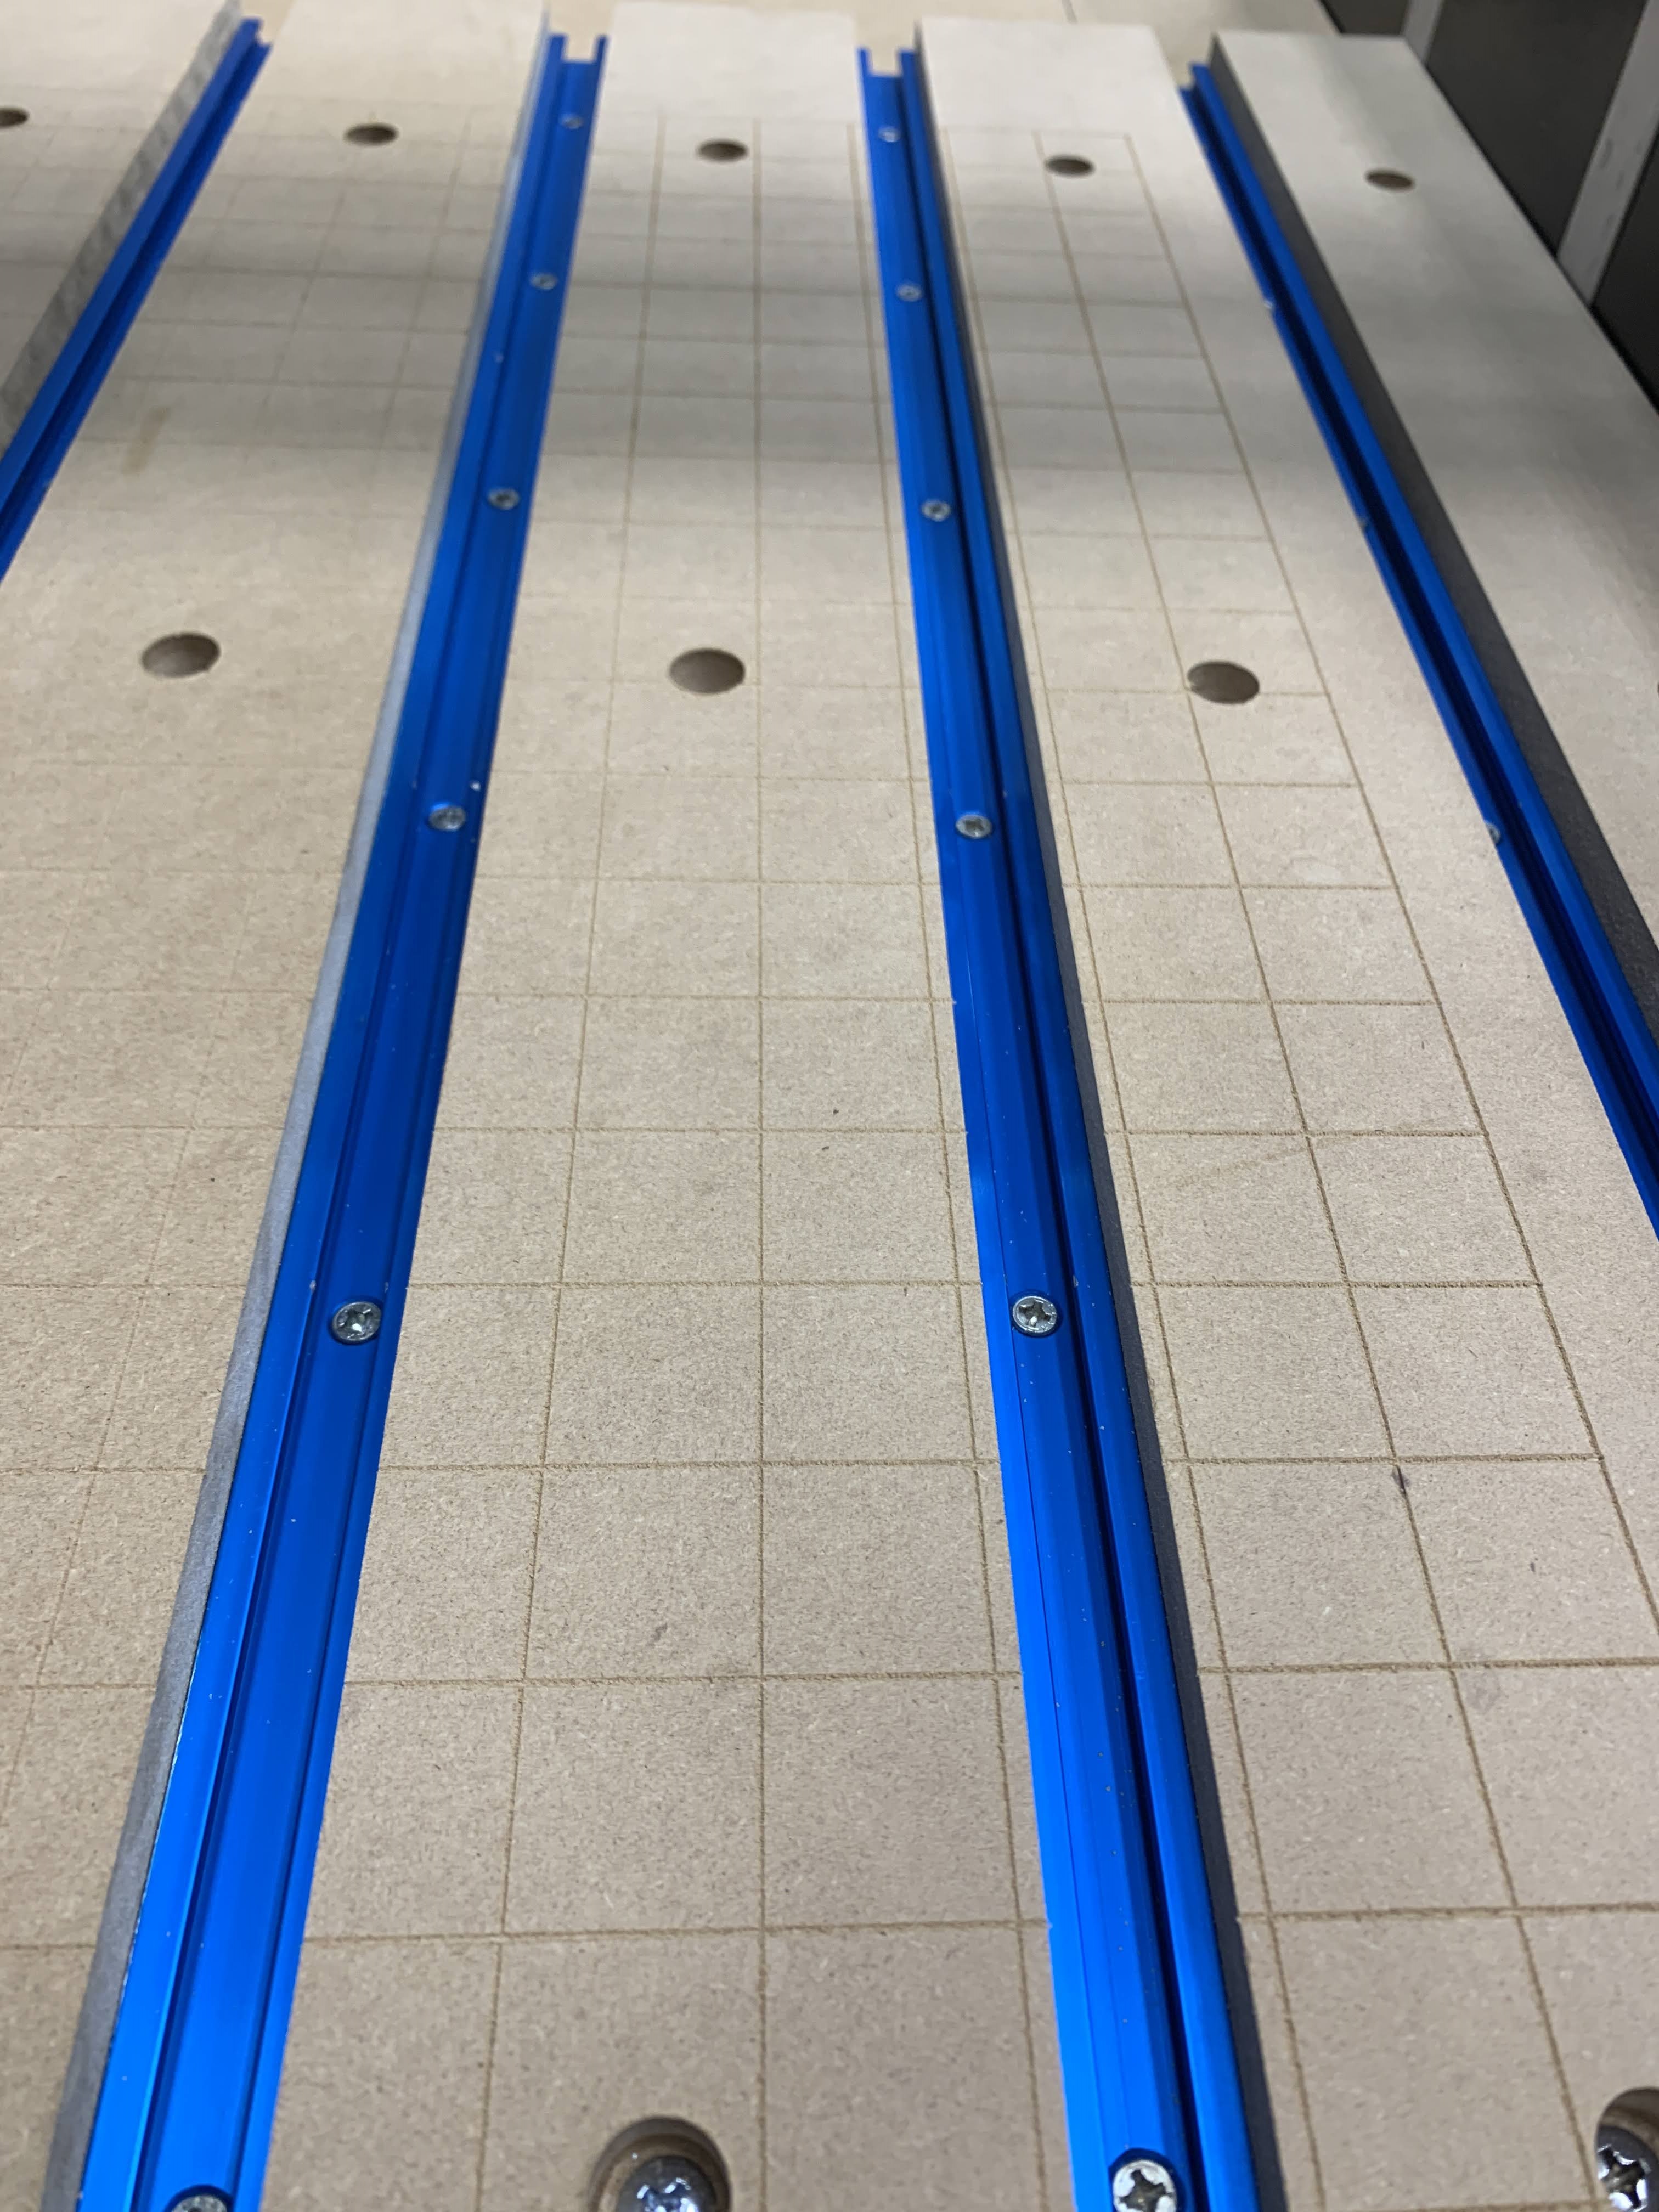
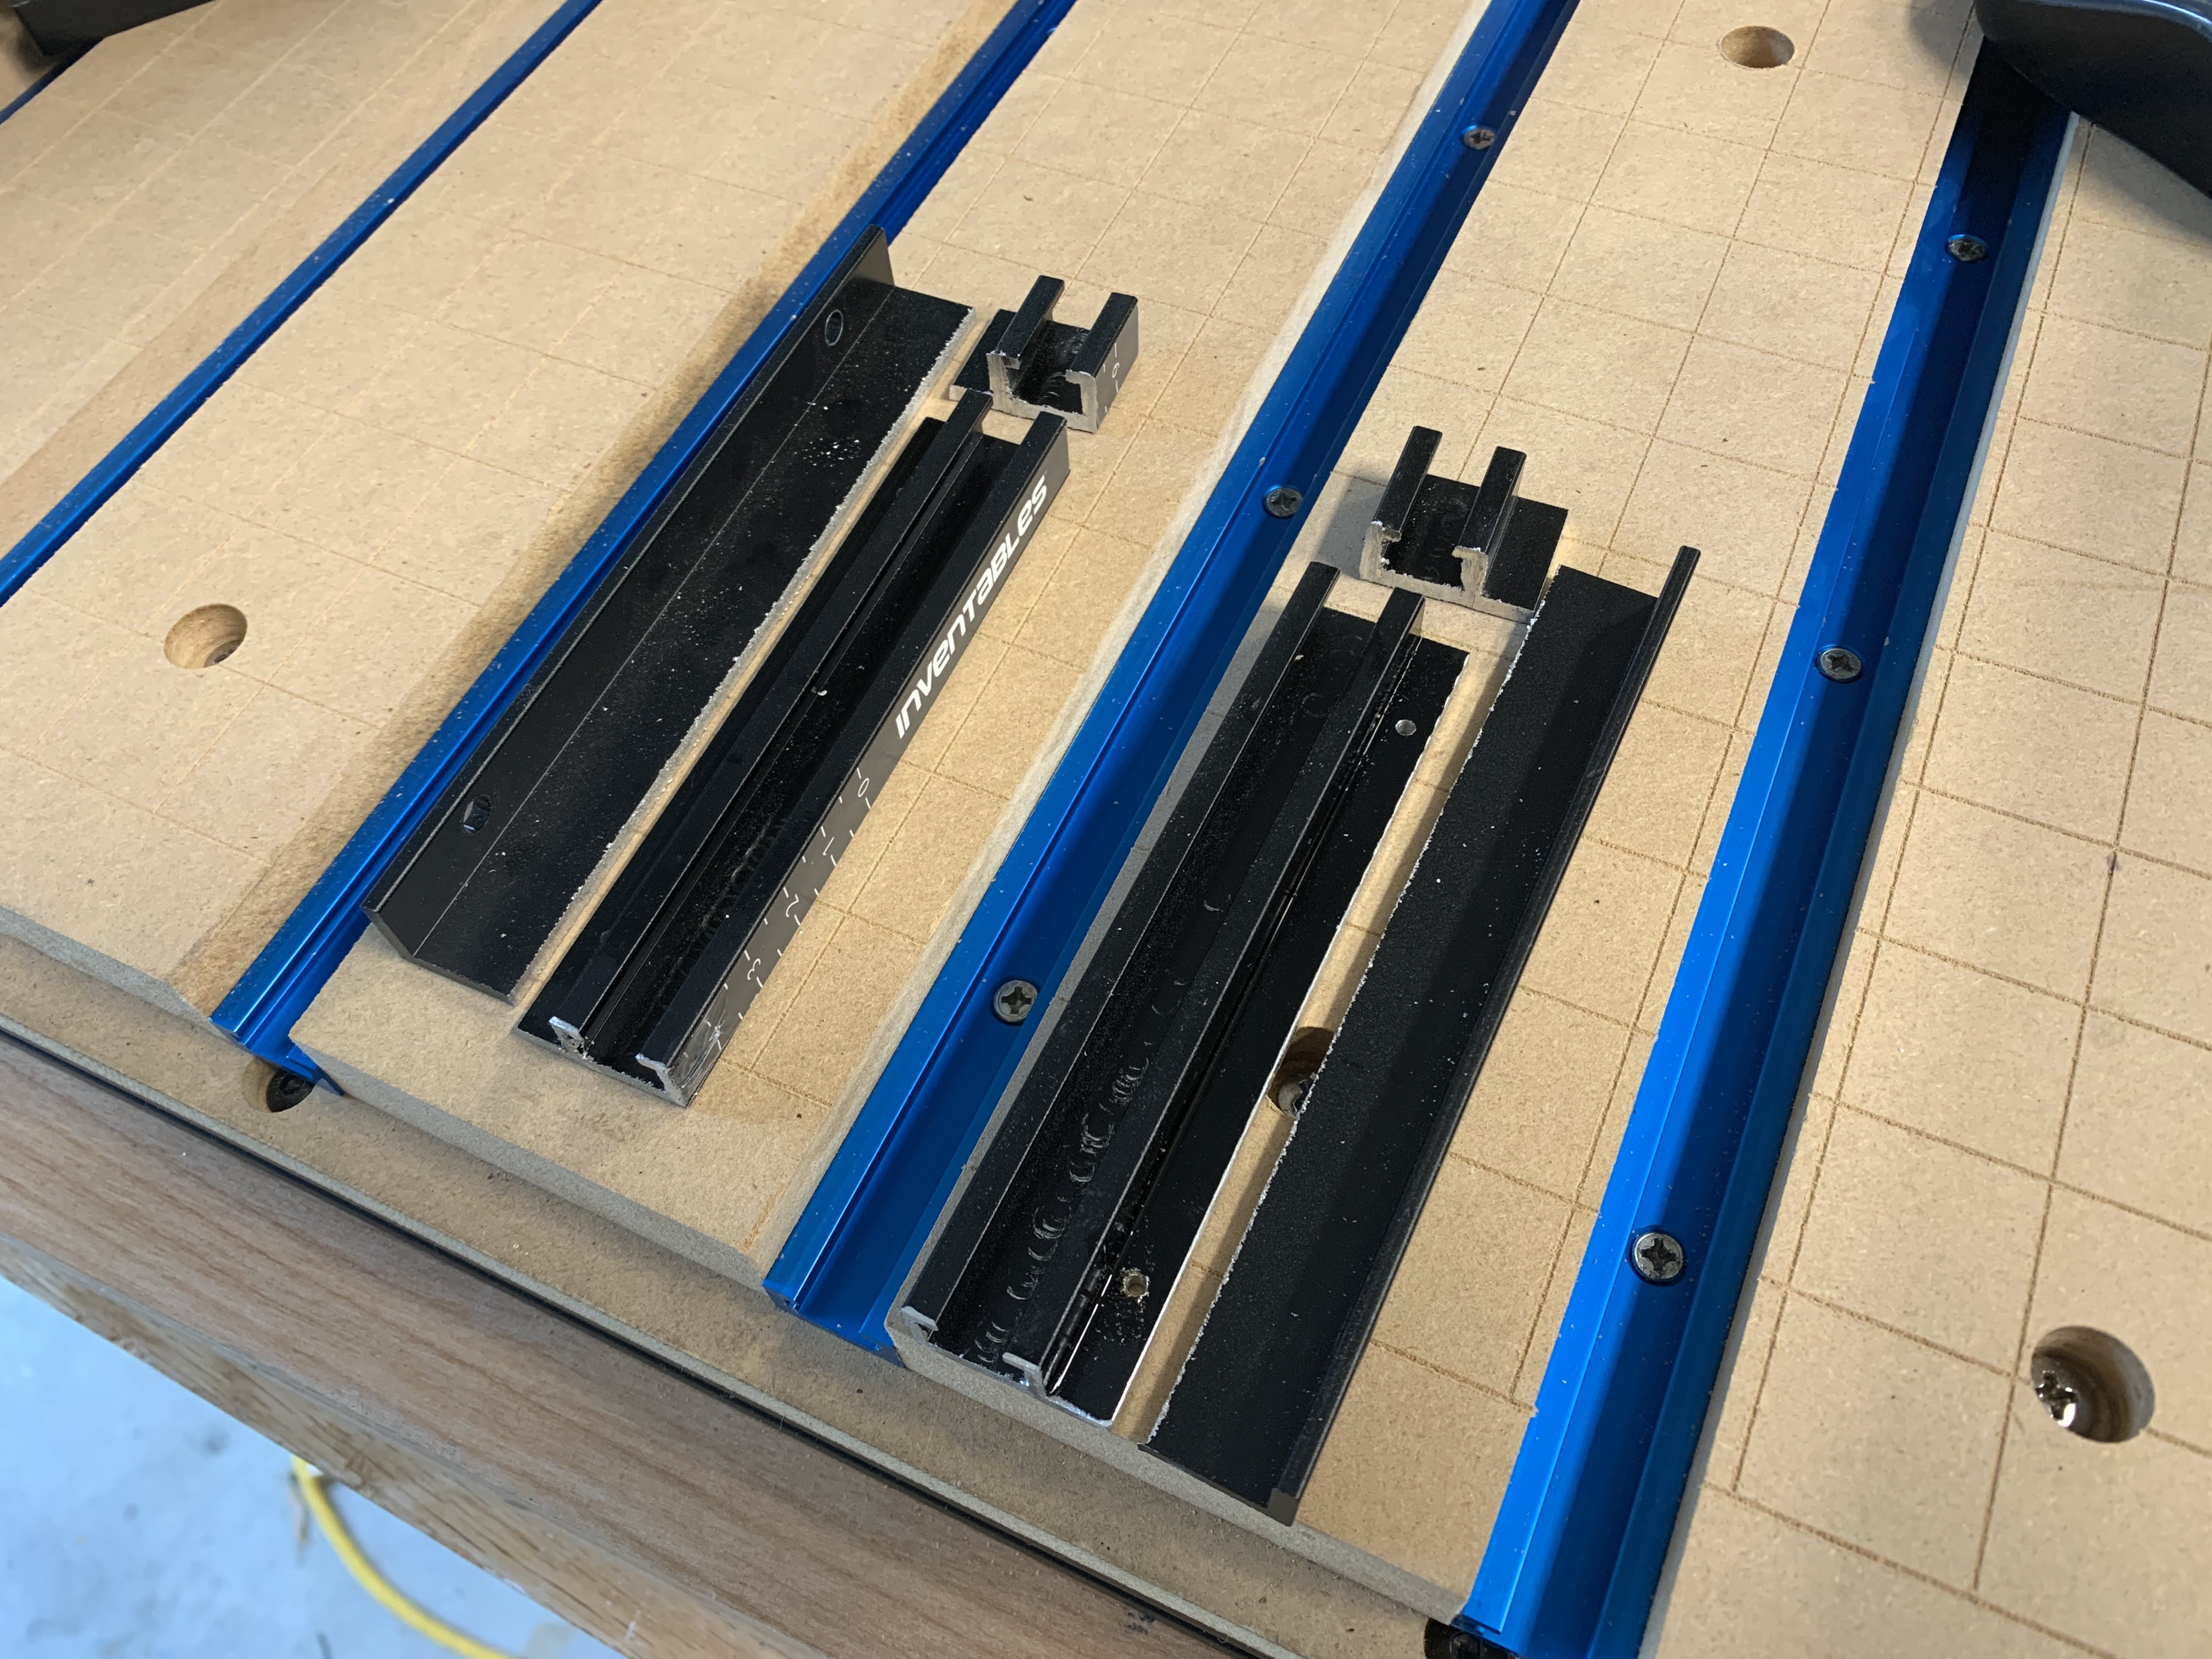
I am still experimenting with the bed, for now, I thought I would try a T-track upgrade with 3/4" MDF plates. I am not over happy with this as I think it gives me fewer options for fixing material to the bed. I will probably add back into the MDY the M5 inserts to use simple clamps that came with the x-carve for smaller pieces.
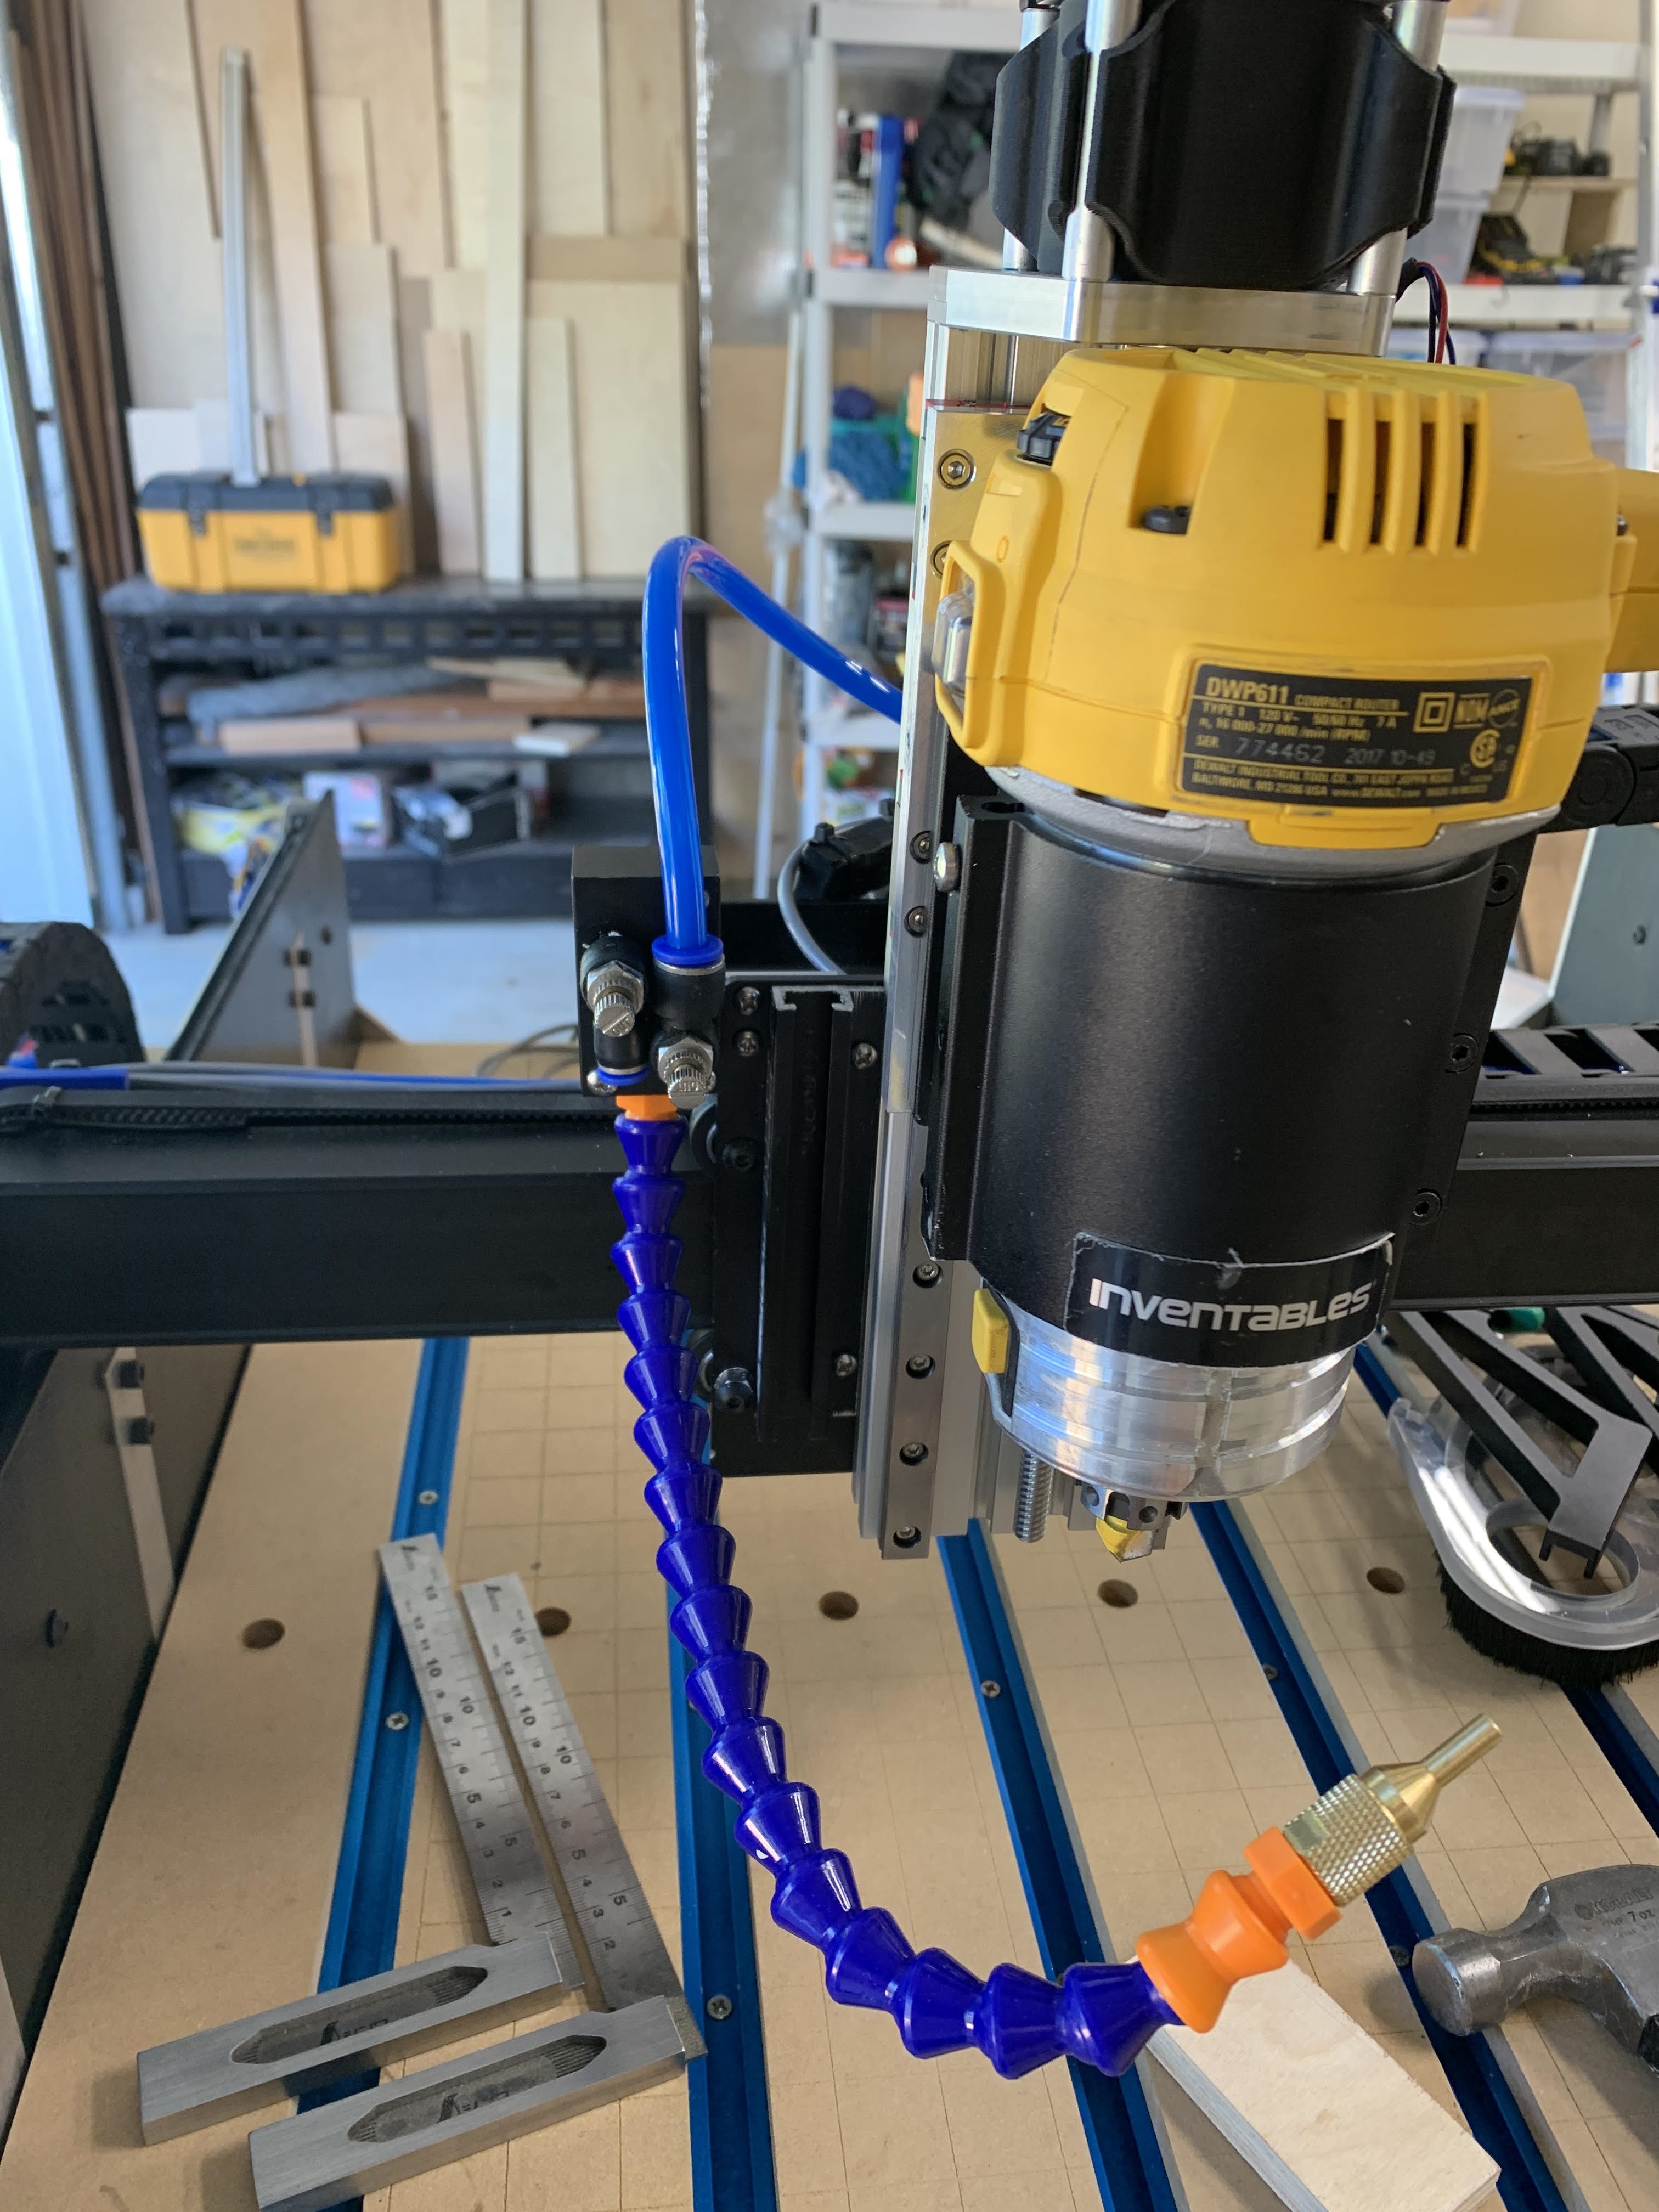
I ran an air assist system through the cable chains and connected the brackets, but I have not set up or used it yet.
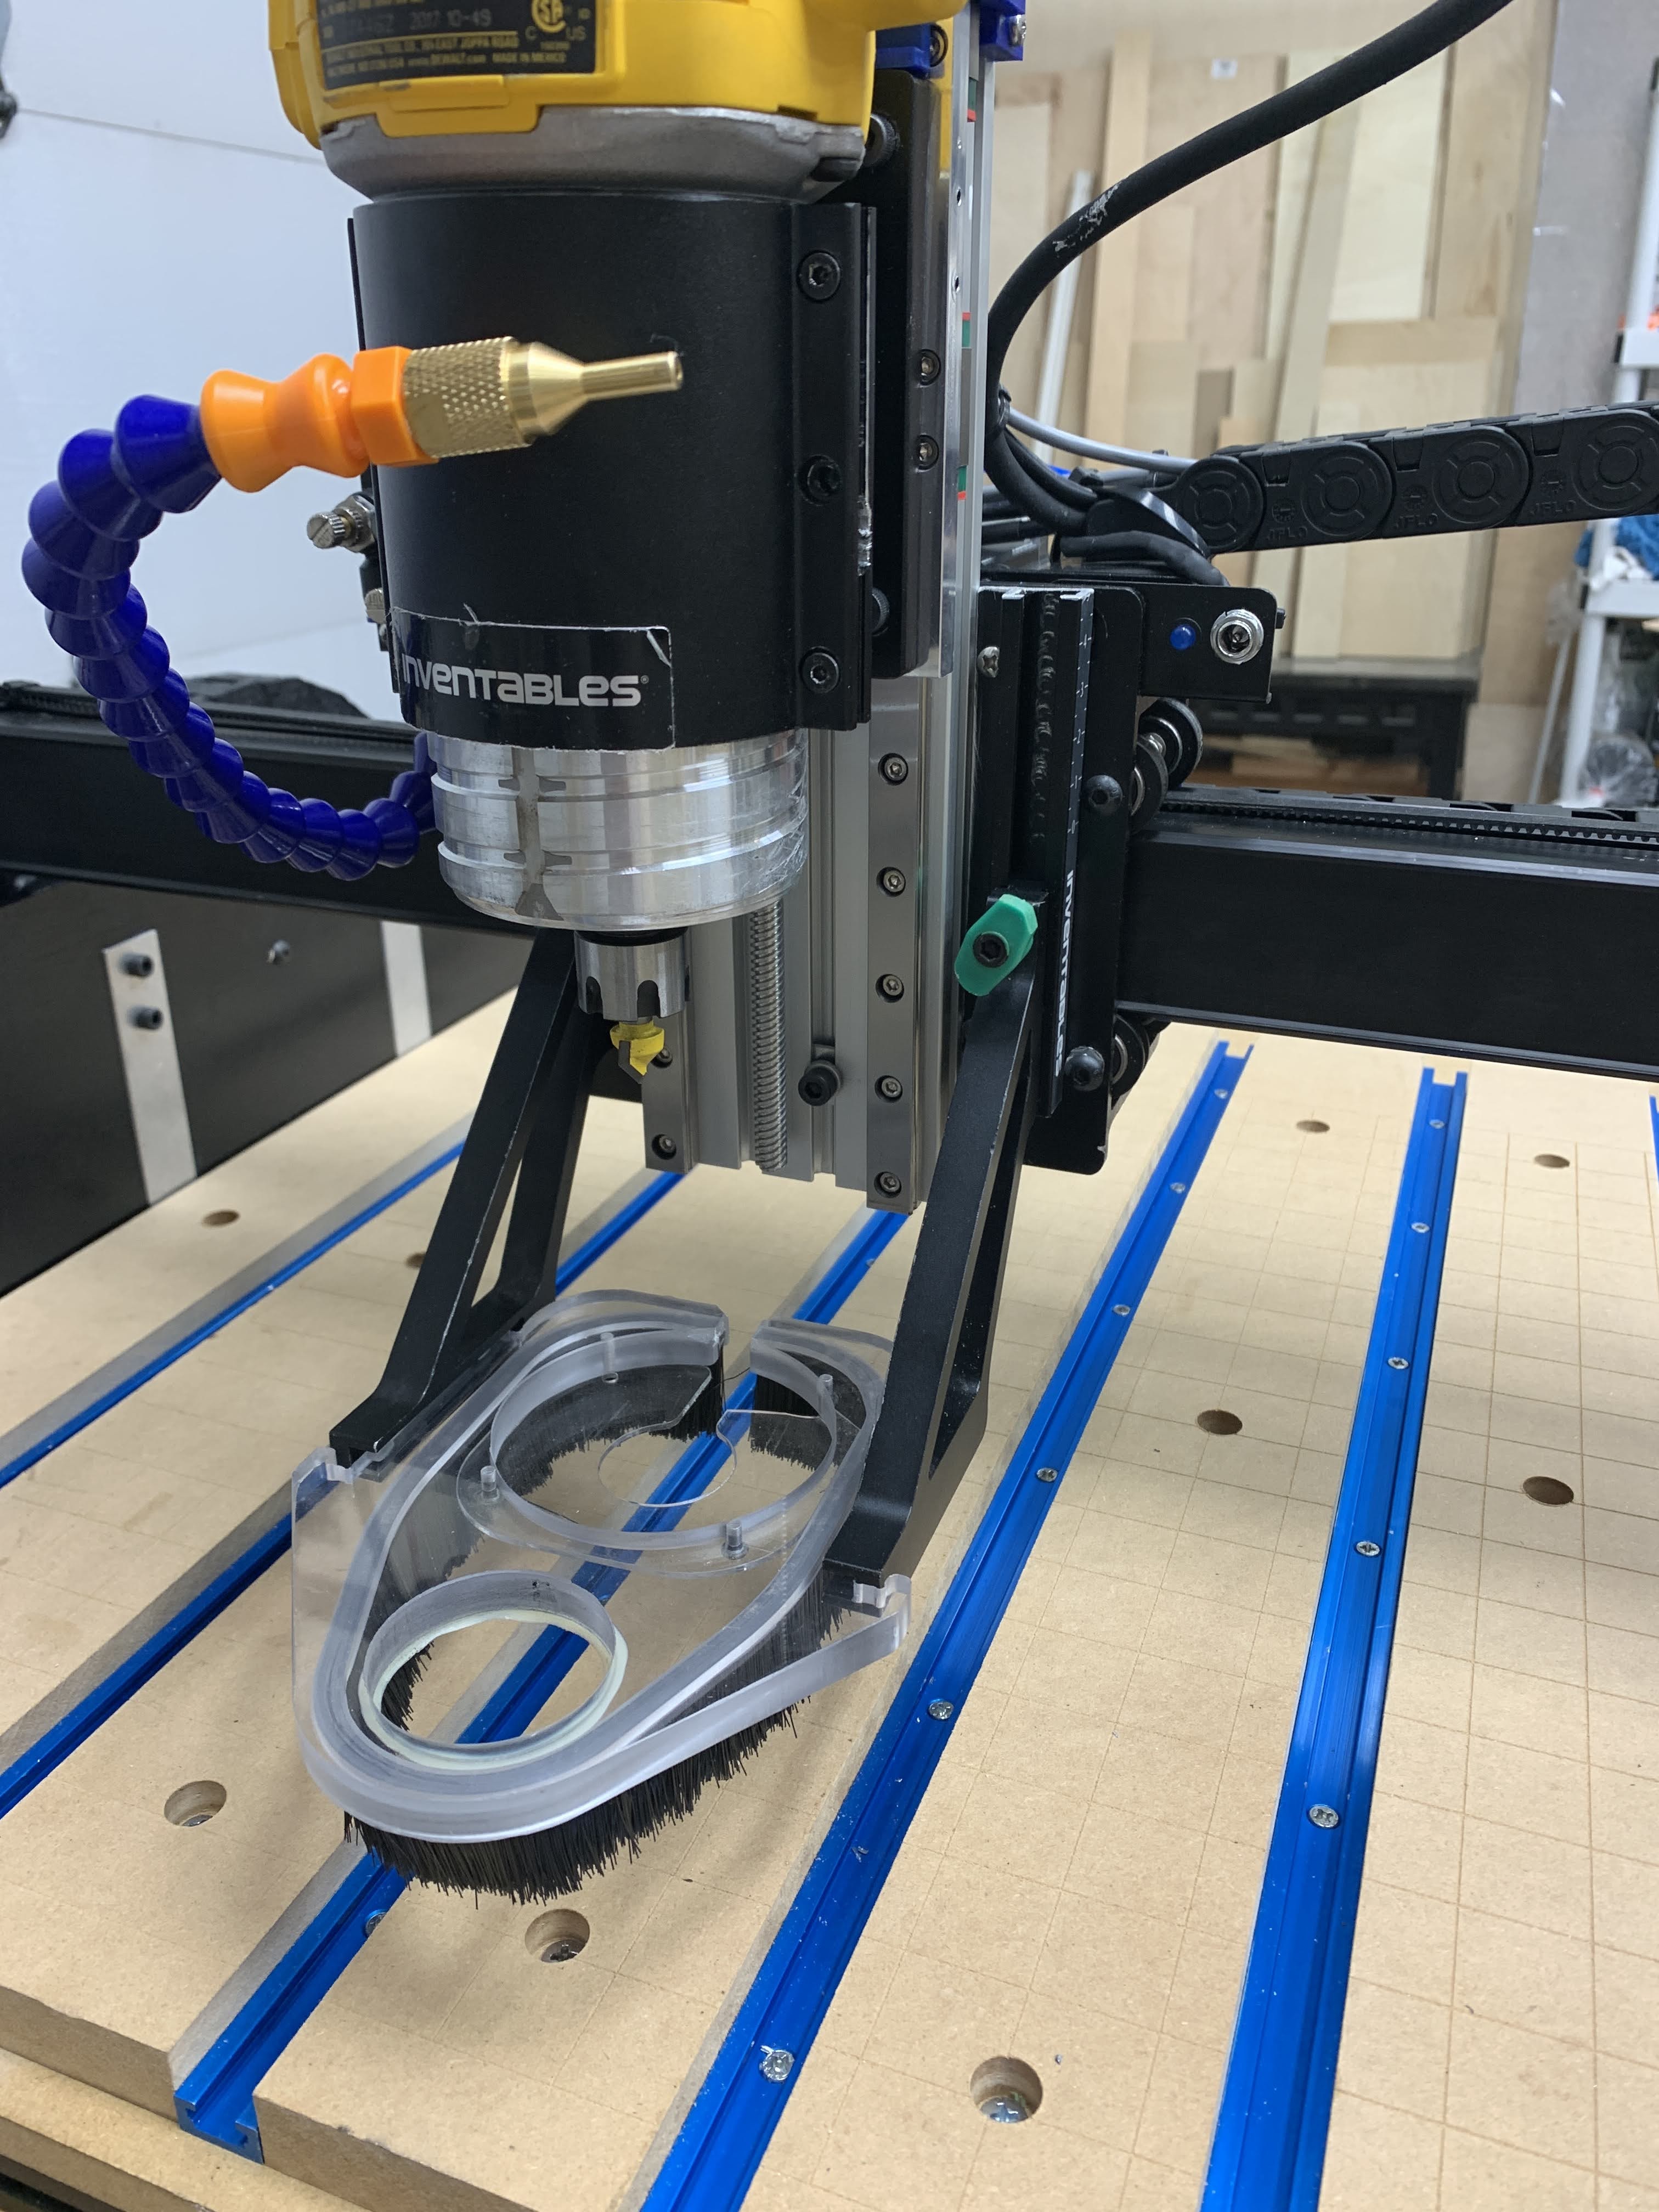
I was able to modify the inventables dust collection system to work with the supergrade z-axis, but did destroy the mounting brackets.
Workflow
My workflow for 2.5D carving is typically:
- Draw my cuts in AutoCAD lt 2011, then export dwf file. I have tried using Inkscape and adobe illustrator, but have preferred using cad for accurate measurements since I have an old LT license.
- Setup my material in Vectric vcarve desktop version 9.5 and then import my dwf and position on the material.
- select the curves and bits.
- export gcode using the grbl gcode post-processor plugin for vcarve desktop.
- Setup the machine and probe the material.
- load the gcode into cncjs using the desktop website.
- run the cut